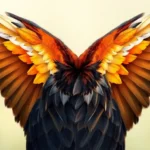
Ravens have captivated artists and nature enthusiasts for centuries with their striking black silhouettes and intelligent expressions. These mysterious corvids make compelling subjects for drawing, whether you’re a beginner sketching your first bird or an experienced artist perfecting realistic wildlife portraits.
We’ve discovered that drawing ravens offers unique challenges and rewards. Their glossy black feathers require mastering light and shadow techniques, while their expressive eyes and distinctive beak shape demand attention to anatomical details. The raven’s powerful presence and symbolic significance in various cultures make each drawing feel meaningful and impactful.
Whether you’re drawn to realistic pencil sketches or stylized interpretations, we’ll guide you through the essential techniques for capturing these magnificent birds on paper. From understanding their basic anatomy to mastering the subtle variations in their plumage, you’ll learn everything needed to create stunning raven artwork that truly captures their wild essence.
Understanding Raven Anatomy for Accurate Bird Drawing
Mastering raven anatomy forms the foundation for creating compelling bird drawings that capture these intelligent creatures authentically. We’ll break down the essential physical characteristics that make ravens distinctive among corvids.
Key Physical Features to Observe
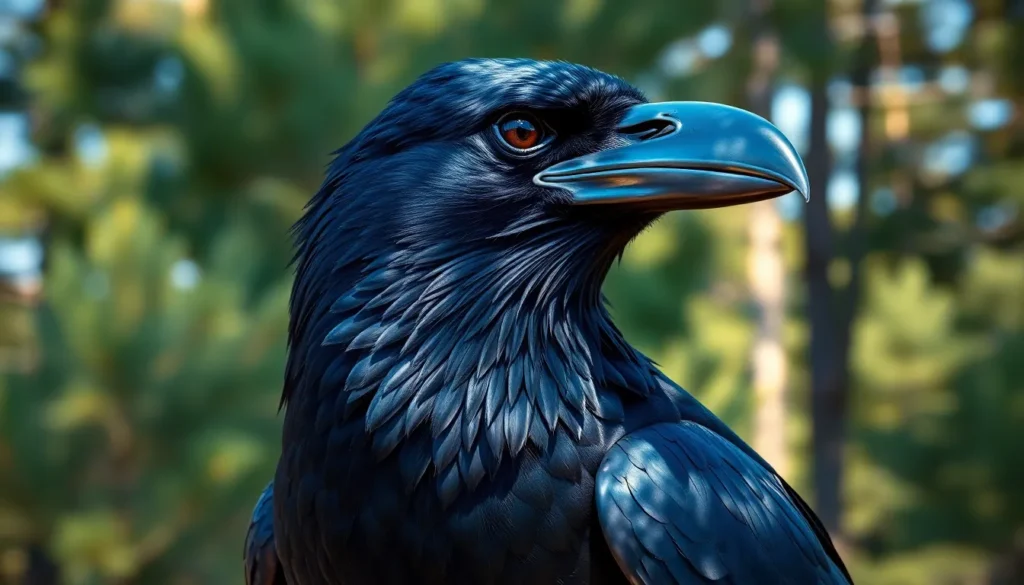
Ravens possess a robust, wedge-shaped bill that’s significantly larger than their crow cousins, measuring approximately 2.5 to 3.5 inches in length. Their powerful beak serves multiple functions from cracking nuts to manipulating objects, giving it a slightly curved appearance at the tip.
The bird’s head displays a distinctive flat-topped profile with a pronounced forehead that slopes gradually into the bill. Ravens feature small, dark eyes positioned relatively high on their skull, creating an alert and intelligent expression that’s crucial to capture in drawings.
Their throat displays shaggy, elongated feathers called hackles that create a distinctive “beard” effect during calls or displays. These throat feathers often appear ruffled and unkempt, adding character to the bird’s overall appearance.
Ravens showcase thick, sturdy legs covered in dark scales, with four toes per foot arranged in the classic bird pattern. Each toe ends in a sharp, curved claw designed for gripping branches and manipulating objects.
Proportions and Body Structure
A raven’s body measures approximately 24 to 27 inches from bill tip to tail tip, making them the largest member of the crow family. Their wingspan extends dramatically from 46 to 53 inches, creating an impressive silhouette in flight.
The bird’s torso appears robust and barrel-shaped, with a broad chest that tapers toward the tail. Ravens maintain a height ratio where their legs account for roughly one-fourth of their total body length when standing upright.
Their neck connects seamlessly to the body without visible constriction, allowing for the fluid head movements ravens are known for. The head itself comprises about one-sixth of the bird’s total body length, appearing proportionally larger than many other bird species.
Ravens display a tail length that equals approximately 40% of their body length, creating the distinctive diamond or wedge shape visible during flight. This tail proportion differs significantly from crows, whose tails appear more squared off.
Wing and Feather Details
Raven flight feathers showcase a glossy, iridescent quality that reflects blues, purples, and greens depending on lighting conditions. Primary flight feathers number ten per wing, with each feather displaying finger-like separations at the tips during soaring flight.
The bird’s wing coverts create overlapping layers that form smooth transitions from the body to the flight feathers. These smaller feathers often display subtle texture variations that add depth to detailed drawings.
Ravens possess distinctively long flight feathers that extend well beyond their tail when folded, creating pointed wing tips. Their secondary flight feathers connect the primaries to the body coverts, maintaining the wing’s aerodynamic profile.
The bird’s contour feathers create their sleek body outline while providing insulation and weather protection. These feathers overlap like shingles on a roof, with each feather’s barbules creating the smooth appearance characteristic of healthy ravens.
Gathering Reference Materials for Your Raven Bird Drawing

Building a strong reference collection forms the foundation of any successful raven bird drawing. Quality source materials help us capture the intricate details that make these corvids so captivating to draw.
High-Quality Photography Sources
Professional wildlife photography sites offer our best starting point for detailed raven imagery. Audubon Society’s online gallery features thousands of high-resolution raven photos taken by expert bird photographers across North America. Flickr’s Creative Commons section provides another excellent resource where photographers share their work under open licenses.
Museum collections like the Cornell Lab of Ornithology’s Macaulay Library house extensive photographic databases with images categorized by behavior and season. National Geographic’s wildlife archives showcase ravens in their natural habitats with exceptional clarity and lighting conditions.
iStock and Shutterstock maintain vast collections of professional raven photography when we need exact angles or poses. Unsplash offers free high-quality images that work particularly well for studying basic proportions and silhouettes.
Local bird photography groups on Facebook and Reddit often share recent shots from nearby areas. Instagram hashtags like #ravenphoto and #corvid provide access to contemporary wildlife photography from around the industry.
Field Sketching Techniques
Direct observation gives us unmatched insight into raven behavior and movement patterns. Quick gesture sketches capture the essential shapes and postures we’ll never see in static photographs. Five-minute studies focus on overall proportions while ravens perch or forage.
Blind sketching techniques help us develop muscle memory for common raven poses. Continuous line drawings train our eyes to follow the bird’s contours without breaking concentration.
Behavioral notation systems record exact actions like head tilts wing positions and tail movements. Time-stamped sketches document how ravens shift their weight and adjust their stance throughout the day.
Weather condition notes remind us how environmental factors affect feather appearance and body language. Light direction markers help us remember shadow patterns for later studio work.
Portable sketch kits should include 4B and 6B graphite pencils waterproof paper and blending stumps. Binoculars allow detailed observation from respectful distances that won’t disturb the birds.
Digital Reference Collections
Organized digital libraries streamline our drawing process and improve artistic consistency. Folder systems categorized by angles seasons and behaviors help us locate exact references quickly.
Pinterest boards create visual mood collections that inspire different artistic approaches to raven subjects. Google Drive folders allow cloud access to our reference materials from any drawing location.
Adobe Lightroom catalogs offer professional organization tools with keyword tagging and rating systems. Photo editing software helps us adjust contrast and brightness to better study feather textures and details.
3D model repositories like Sketchfab provide rotatable raven models for understanding complex anatomical structures. Animation reference sites show wing movement patterns and flight mechanics through frame-by-frame sequences.
Screencap tools help us capture exact moments from wildlife documentaries and nature videos. Color sampling applications extract exact hex codes from reference photos for digital raven bird drawing projects.
Backup systems protect our reference collections through cloud storage and external drive redundancy. Mobile apps sync our collections across devices so references stay accessible during outdoor sketching sessions.
Essential Drawing Supplies for Raven Bird Drawing Projects

Selecting the right drawing supplies significantly impacts your ability to capture the intricate details and dramatic contrasts of raven plumage. Quality materials enhance your artistic expression while providing the precision needed for these magnificent corvid subjects.
Traditional Drawing Materials
Pencils form the foundation of successful raven drawings, with graphite grades ranging from 2H to 8B offering complete tonal control. We recommend starting with a basic set including H, HB, 2B, 4B, and 6B pencils to achieve everything from delicate feather textures to deep shadow work. Mechanical pencils with 0.5mm leads excel at capturing fine details like individual barbs and eye reflections.
Blending tools create smooth transitions between light and shadow on glossy raven feathers. Blending stumps in sizes 2, 4, and 6 provide precise control for small areas, while chamois cloths work beautifully for larger wing surfaces. Kneaded erasers shape into fine points for lifting highlights from dark areas, particularly effective for creating that characteristic iridescent sheen.
Charcoal adds dramatic depth to raven portraits through its rich blacks and soft application. Compressed charcoal sticks deliver intense darks for primary feathers, while vine charcoal creates subtle gradations in contour feathers. White charcoal pencils enhance drawings on toned paper by establishing bright highlights on beaks and eye catches.
Specialty tools enhance precision in detailed raven artwork. Tortillons measuring 1/4 inch work perfectly for blending small feather groups, while paper stumps handle broader wing sections. Fine sandpaper blocks keep pencil points sharp throughout extended drawing sessions, and dusting brushes remove eraser debris without smudging delicate work.
Digital Drawing Tools and Software
Professional drawing software provides comprehensive tools for creating stunning digital raven illustrations. Adobe Photoshop leads with its advanced brush engines and layer systems that simulate traditional media while offering unlimited editing flexibility. Procreate transforms iPads into portable studios with intuitive interfaces perfect for field sketching and detailed artwork.
Specialized brushes replicate natural textures found in raven plumage and environmental elements. Custom feather brushes simulate individual barbs and flight feather structures, while texture brushes create realistic branch surfaces and atmospheric backgrounds. Many artists create personalized brush sets specifically for corvid subjects, incorporating various opacity levels and flow settings.
Drawing tablets deliver precise control comparable to traditional pencils and brushes. Wacom Intuos Pro tablets offer 8,192 pressure levels for subtle line variation, while Huion H610 Pro provides affordable professional features. Display tablets like XP Pen Artist 15.6 Pro allow direct drawing on screen surfaces, bridging the gap between digital and traditional methods.
Software features streamline the drawing process through layers, adjustment tools, and reference integration. Layer masks enable non destructive editing of feather details, while adjustment layers fine tune contrast and lighting effects. Reference photo integration keeps source images visible alongside artwork, ensuring anatomical accuracy throughout the creation process.
Paper Selection and Preparation
Drawing paper texture dramatically affects the final appearance of raven artwork and technique compatibility. Medium grain papers like Strathmore 400 Series provide balanced tooth for both detailed work and broad shading techniques. Hot pressed papers create smooth surfaces ideal for precise feather rendering, while cold pressed options add subtle texture that enhances natural wing patterns.
Weight considerations impact durability and blending capabilities during intensive raven drawing sessions. 140lb papers handle multiple erasing cycles without surface damage, while 90lb options work well for quick studies and gesture drawings. Heavier weights like 200lb support wet media combinations and prevent cockling during blending work.
Paper preparation optimizes drawing surfaces for consistent results across different lighting conditions. Light sanding with 400 grit paper creates uniform tooth patterns, while fixative applications seal surfaces before starting detailed work. Toned papers in warm gray or cool blue provide middle values that accelerate the drawing process by eliminating pure white backgrounds.
Surface treatments enhance exact techniques used in professional raven illustrations. Gesso applications create toothy surfaces perfect for charcoal and pastel combinations, while vellum overlays protect finished areas during extended sessions. Bristol board offers ultra smooth surfaces for technical pen work and precise anatomical studies.
Mastering Basic Raven Shapes and Proportions

We’ll build strong raven drawings by breaking down these complex birds into manageable geometric elements. Successful raven artwork depends on understanding fundamental proportions that define their distinctive silhouette.
Starting with Simple Geometric Forms
Ovals form the foundation of every compelling raven drawing we create. We begin with a large oval for the body, positioned at a slight diagonal to capture their natural posture. A smaller oval represents the head, overlapping the body shape by approximately one-third to establish proper connection points.
Triangular shapes define key features like the powerful beak and tail structure. We sketch the beak as an elongated triangle extending from the head oval, making it roughly one-third the length of the head itself. The tail appears as a diamond or wedge shape, crucial for capturing ravens’ characteristic flight silhouette.
Cylindrical forms represent the neck and legs in our initial construction phase. We draw the neck as a flexible cylinder connecting head to body, allowing for the varied poses ravens display. Simple cylinders also work for leg placement, though we’ll often hide these beneath the bird’s body in most compositions.
Angular guidelines help position the wings when ravens spread them for flight or display. We use elongated triangular shapes to map wing placement, ensuring they attach properly to the body’s upper portion. These geometric markers prevent common proportion mistakes that make raven drawings appear awkward or unnatural.
Establishing Proper Head-to-Body Ratios
Ravens maintain a 1:3 head-to-body ratio that distinguishes them from smaller corvids like crows. We measure the head length and multiply by three to determine proper body proportions. This ratio creates the robust appearance that makes ravens appear more substantial than their corvid relatives.
Head width equals approximately half the body width at its broadest point near the chest area. We check this proportion by drawing guidelines across both the head and body sections. Maintaining this relationship prevents our raven drawings from appearing too cartoonish or disproportionate.
Beak length spans one-third of the head dimension from crown to chin measurement. We position the beak’s base at eye level, extending it forward to create ravens’ distinctive profile. The beak’s thickness should match roughly half its length to capture their powerful feeding apparatus.
Eye placement occurs at the head’s geometric center when viewed from the side profile. We position eyes slightly above the midline and set them back from the beak’s base by one eye-width distance. This positioning creates the intelligent expression ravens are known for displaying.
Creating Accurate Wing Spans
Wingspan measurements reach 3.5 to 4 times the body length in adult ravens, creating their impressive flight silhouette. We sketch wingspan guidelines extending from shoulder attachment points to ensure proper proportional relationships. These measurements help distinguish ravens from smaller birds in our artwork compositions.
Primary flight feathers extend beyond the body by approximately one full body length when wings are fully spread. We mark these extension points during our initial sketching phase to prevent cramped wing positioning. Proper primary feather placement creates the majestic appearance ravens display during soaring flight.
Wing attachment points sit high on the back rather than at mid-body level like many other bird species. We position wing joints at the upper third of the body oval, creating ravens’ characteristic broad-shouldered appearance. This high attachment allows for their powerful flight capabilities and distinctive silhouette shape.
Secondary feathers fill the gap between body and primary feathers, creating smooth wing transitions. We sketch these as overlapping segments that gradually decrease in size toward the body. Proper secondary feather proportions prevent our raven wings from appearing segmented or artificially constructed in the final artwork.
Sketching Raven Head Details and Facial Features

Moving beyond basic proportions, we’ll focus on the intricate features that give ravens their unmistakable character and intelligence.
Drawing the Distinctive Beak Shape
Start with a wedge foundation to establish the robust, powerful structure that distinguishes raven beaks from other corvids. Ravens possess thick, slightly curved bills that measure approximately one-third the length of their head from crown to chin.
Create the upper mandible by drawing a gentle downward curve that extends beyond the lower jaw line. This upper section should appear heavier and more prominent than typical songbird beaks, reflecting the raven’s adaptability as an omnivore.
Shape the lower mandible with a straighter line that connects to the upper beak at a sharp point. Ravens display a subtle gap between their mandibles when relaxed, creating a characteristic expression that suggests perpetual contemplation.
Add the nostril details by placing small oval shapes near the base of the upper mandible. These nostrils sit within a patch of bristle-like feathers that we’ll address in the texture section.
Define the beak’s thickness by adding a center ridge line along the upper mandible. This dimensional element catches light naturally and creates the sturdy appearance that makes raven beaks so formidable in drawings.
Capturing Intelligent Eye Expression
Position the eye correctly by placing it approximately one-third back from the beak tip and slightly above the mandible junction. Raven eyes appear proportionally smaller than those of owls or hawks, contributing to their shrewd expression.
Establish the eye’s almond shape rather than drawing a perfect circle. Ravens possess elongated eyes that slant slightly upward toward the back of the head, creating an alert and calculating appearance.
Create depth with the eye socket by adding subtle shading around the orbital area. This recessed positioning protects the eye and creates natural shadows that enhance the three-dimensional quality of your drawing.
Render the iris and pupil with careful attention to light reflection. Raven eyes typically appear dark brown or black in most lighting conditions, requiring strategic highlight placement to suggest their glossy surface without losing the mysterious quality.
Add the nictitating membrane as a subtle detail that can suggest movement or alertness. This translucent eyelid occasionally appears as a slight film across the eye surface, particularly when ravens feel threatened or focused.
Include surrounding wrinkles that form naturally around mature raven eyes. These expression lines contribute significantly to the wise, ancient appearance that makes ravens such compelling subjects for artwork.
Rendering Head Feather Textures
Begin with directional flow mapping to establish how feathers naturally lay across different areas of the raven head. Crown feathers radiate outward from a central point, while throat feathers cascade downward in loose, shaggy patterns.
Layer the crown feathers using short, overlapping strokes that follow the skull’s curvature. These feathers appear sleek and tight against the head, creating smooth transitions that reflect light uniformly across their surfaces.
Develop the throat hackles with longer, more irregular strokes that suggest the loose, unkempt appearance characteristic of raven necks. These feathers often catch wind and movement, creating ever-changing texture opportunities in your drawings.
Vary your pencil pressure to simulate the iridescent quality of raven plumage. Darker areas between feathers create depth, while lighter touches on feather edges suggest the subtle color variations that make raven feathers so visually interesting.
Add individual feather details sparingly to avoid overwhelming the overall form. Select key areas where light hits prominently and define individual feather shapes to guide the viewer’s eye without creating visual chaos.
Blend transition areas where different feather groups meet, such as the junction between crown and nape feathers. These smooth gradations prevent your drawing from appearing segmented while maintaining realistic feather behavior patterns.
Perfecting Raven Wing Structure and Feather Patterns

Building upon our foundation of raven anatomy, we’ll now master the intricate details that bring wings to life through accurate structure and realistic feather rendering.
Understanding Wing Anatomy
Wing bones provide the essential framework that supports our raven drawing’s believability. Ravens possess three distinct wing sections: the primary flight feathers attached to the hand bones, secondary feathers connected to the forearm, and tertiary feathers near the body. Each section creates exact angles and curves that we must capture accurately.
Primary feathers extend from the wing tip and create the bird’s distinctive silhouette during flight. These ten flight feathers appear longest at positions 7-9, gradually shortening toward the wing tip and body attachment point. We observe how these feathers fan out during soaring and fold neatly against the body when at rest.
Secondary feathers form the wing’s middle section and number between 18-25 depending on the raven’s size. These feathers maintain consistent lengths and create smooth curves that connect the primaries to the body. Wing coverts overlay the base of flight feathers, creating multiple layers that add depth and dimension to our drawings.
Tertiary feathers bridge the gap between wings and body, often appearing ruffled or loose compared to flight feathers. These feathers help create the seamless transition from wing to torso that makes raven drawings appear natural and proportionate.
Creating Realistic Feather Overlays
Feather layering follows exact patterns that we can replicate through systematic approaches. Starting with the underlying wing structure, we build feather groups from back to front, allowing each layer to partially cover the previous one. This technique creates the natural overlap pattern seen in living ravens.
Contour feathers form the outer layer and determine the wing’s overall shape and smoothness. These feathers appear shorter near the leading edge and gradually increase in length toward the trailing edge. We render these feathers with smooth, flowing strokes that follow the wing’s natural curves.
Down feathers remain mostly hidden but occasionally peek through gaps in the contour feathers. Adding subtle hints of these softer feathers near the wing base creates textural variety and suggests the warmth beneath the outer plumage. Small, irregular shapes work well for representing these underlying feathers.
Feather direction changes throughout the wing, requiring careful attention to growth patterns. Feathers near the leading edge angle backward, while those on the trailing edge point more directly away from the body. Following these directional changes prevents our raven wings from appearing flat or artificial.
Light interaction varies across different feather types, with flight feathers showing more pronounced highlights and shadows. Contour feathers display subtle gradations, while down feathers appear softer with diffused lighting. Understanding these lighting differences helps create convincing three dimensional wing forms.
Adding Movement and Flow
Ever-changing wing positions require understanding how feathers behave during different flight phases. During the downstroke, primary feathers press together and angle downward, creating clean, sharp wing tips. The upstroke separates these feathers slightly, allowing air passage and creating more irregular silhouettes.
Feather flex appears most dramatically in the primary flight feathers during active flight. These feathers bend backward under air pressure, creating graceful curves rather than rigid straight lines. We capture this flexibility by drawing gentle arcs instead of mechanical geometric shapes.
Wind effects influence how we render feather edges and surfaces. Calm conditions allow feathers to lie smoothly against each other, while breezy weather creates lifted edges and separated feather tips. Adding these environmental effects makes our raven drawings feel more alive and connected to their surroundings.
Overlapping feathers create visual depth through strategic shadow placement and edge variation. Feathers casting shadows on those beneath them establish clear spatial relationships. We use darker values where feathers overlap and lighter tones on exposed surfaces to enhance this dimensional effect.
Motion blur techniques can suggest rapid wing movement in action poses. Softening feather edges and blending adjacent tones creates the impression of speed without losing the wing’s recognizable structure. This approach works particularly well for depicting ravens in aggressive flight or landing maneuvers.
Shading Techniques for Realistic Raven Bird Drawing

Mastering shading transforms our raven drawings from flat sketches into lifelike representations that capture the bird’s dramatic presence. We’ll explore essential techniques that bring depth and realism to every feather and contour.
Working with Deep Black Tones
Building layers of graphite creates the intense blacks characteristic of raven plumage. We start with medium pressure using a 4B pencil to establish base tones across larger feather areas. Multiple passes with progressively darker pencils achieve the rich blacks without creating unwanted shine on our paper surface.
Burnishing techniques help us achieve true black values in critical areas. We use a 6B or 8B pencil with firm pressure to compress graphite into the paper fibers. Blending stumps worked in circular motions eliminate grain texture and create smooth transitions between different black values.
Strategic placement of our deepest blacks enhances overall contrast and drama. We reserve true black values for shadow areas under wing coverts, throat patches, and spaces between overlapping feathers. These anchor points provide reference values that make lighter areas appear more luminous by comparison.
Charcoal pencils offer superior black density for accent areas. We apply compressed charcoal sparingly to achieve blacks deeper than graphite alone can produce. Fixative spray prevents smudging and allows us to layer additional graphite over sealed charcoal sections.
Creating Feather Texture Through Shading
Directional strokes follow natural feather growth patterns to create authentic texture. We observe how primary flight feathers extend straight from wing bones while contour feathers curve around the body’s form. Our pencil strokes mirror these directions to suggest individual feather shapes without drawing every barb.
Varying stroke pressure creates the illusion of different feather types across the raven’s body. Light, quick strokes represent the fine down feathers near the head and neck. Firm, confident strokes capture the substantial structure of wing and tail feathers that provide flight power.
Crosshatching techniques add depth to areas where feathers overlap. We build shadows between feather layers using perpendicular stroke patterns. Dense crosshatching in recessed areas contrasts with lighter single strokes on raised feather surfaces.
Texture variation distinguishes glossy flight feathers from matte body plumage. We keep flight feather areas smoother with fewer texture marks to suggest their sleek, aerodynamic surface. Body feathers receive more varied stroke directions and pressures to show their fluffy, insulating quality.
Highlighting Techniques for Dimension
Strategic highlights on feather edges create separation and definition between layers. We use kneaded erasers to lift graphite along feather margins where light would naturally catch raised surfaces. These bright accents prevent our raven from appearing as a solid black mass.
Reflected light on the underside of features adds convincing three dimensional form. We place subtle highlights beneath the beak, along the lower edge of wing feathers, and under tail coverts. These reflected light patterns occur naturally as light bounces off nearby surfaces.
Eye highlights serve as crucial focal points that bring our raven to life. We preserve bright white areas on the eye surface using masking fluid or careful avoidance during initial shading phases. Multiple small highlights suggest the complex surface of the bird’s cornea.
Gradual value transitions create smooth feather contours without harsh edges. We blend highlights into mid tones using tortillons or blending stumps worked in gentle circular motions. Soft transitions between light and shadow areas suggest the rounded form of the raven’s body beneath its feather covering.
Environmental lighting effects add realism through contextual highlighting patterns. We consider our light source direction and add rim lighting along the raven’s silhouette edges. Strong backlighting creates dramatic contrast while soft front lighting reveals subtle feather details.
Drawing Ravens in Different Poses and Positions

Mastering various poses transforms our raven drawings from static studies into compelling compositions that showcase these intelligent birds’ natural behaviors.
Perched Raven Compositions
Perched ravens offer the most stable reference points for practicing detailed anatomy and feather work. We can capture their natural alertness by positioning the head at a slight angle with one eye visible to the viewer. Branch gripping requires attention to their powerful talons wrapping around perches with three toes forward and one backward.
Classic perching poses include the upright sentinel position where ravens survey their territory. The body maintains a vertical orientation with the tail hanging straight down or slightly angled. Wing positioning varies from completely folded against the body to partially extended for balance adjustments.
Side profile perches showcase the raven’s distinctive wedge shaped tail and robust bill most effectively. We position the body at a three quarter angle to display both the chest depth and wing structure. Feather compression occurs where the body contacts the branch creating natural shadowing opportunities.
Hunched feeding postures demonstrate ravens in relaxed states between active behaviors. The neck pulls inward while the head tilts downward toward potential food sources. Shoulder feathers fluff outward creating a broader silhouette that differs significantly from alert posturing.
Flying Raven Ever-changing Poses
Flying ravens present complex challenges requiring understanding of wing mechanics and body positioning during flight. Primary feathers spread wide during active flapping with visible gaps between individual flight feathers. The tail fans out for steering control while the head extends forward to reduce air resistance.
Soaring positions show ravens with wings fully extended and minimal body movement. We capture the slight upward angle of wing tips that creates lift in thermal currents. Tail feathers remain closed and pointed while the body maintains a horizontal orientation parallel to the ground.
Banking turns reveal the asymmetrical wing positions ravens use for directional changes. One wing angles upward while the opposite wing drops lower creating ever-changing diagonal compositions. Body rotation accompanies banking movements with visible twisting through the torso and neck regions.
Landing sequences require depicting the transition from flight to perched positions. Wings angle sharply upward acting as air brakes while talons extend toward landing surfaces. Tail feathers spread wide and angle downward to provide additional stopping power during touchdown approaches.
Ground Based Feeding Positions
Ground feeding ravens adopt distinctive postures that emphasize their opportunistic nature and intelligence. The body leans forward with legs positioned wider than perching stances for stability during ground movement. Head positioning varies frequently as ravens scan for threats while feeding.
Walking gaits show ravens moving with deliberate steps and confident body language. We capture the alternating leg movements with one foot lifted while the other supports full body weight. Wing positioning remains close to the body with slight adjustments for balance during uneven terrain navigation.
Investigative poses demonstrate ravens examining potential food sources or interesting objects. The neck extends downward while the head tilts at various angles for different viewing perspectives. Beak positioning near ground level shows active exploration behaviors characteristic of corvid intelligence.
Aggressive feeding stances occur when ravens defend food sources from competitors. Wings partially spread outward creating larger apparent body size while the head lowers with the beak pointing toward perceived threats. Leg positioning widens further with body weight shifted forward ready for quick defensive movements.
Common Mistakes to Avoid in Raven Bird Drawing

Drawing ravens presents unique challenges that can trip up even experienced artists. We’ve identified the most frequent errors that can undermine your raven artwork and the proven answers to overcome them.
Proportion Errors and Answers
Oversizing the head creates cartoon-like ravens that lack the powerful presence of these magnificent birds. Ravens maintain a head-to-body ratio of approximately 1:3, with the body being significantly larger than many artists initially assume. We recommend establishing this proportion early in your sketch by using basic geometric shapes as guides.
Beak length miscalculations often result from underestimating the robust size of a raven’s bill. The beak should extend roughly one-third the length of the head, creating that distinctive wedge shape that differentiates ravens from other corvids. Measure this proportion carefully against your reference materials to ensure accuracy.
Wing span errors frequently occur when artists compress the impressive 4-foot wingspan that ravens possess. Each wing should extend approximately 1.5 times the body length when fully spread, creating the dramatic silhouette that makes ravens so striking in flight. Practice drawing wing proportions separately before incorporating them into full body compositions.
Tail shape mistakes happen when artists draw generic bird tails instead of the characteristic diamond or wedge shape unique to ravens. The tail should appear roughly half the body length and maintain its distinctive angular profile whether the bird is perched or in flight.
Shading and Texture Pitfalls
Flat black coloring represents the most common shading error in raven drawings. Ravens possess iridescent plumage that reflects blues, purples, and greens depending on lighting conditions. We achieve this effect by layering different pencil grades and leaving strategic highlights that capture the glossy quality of their feathers.
Uniform feather treatment creates unrealistic results because ravens display three distinct feather types with varying textures. Primary flight feathers appear smooth and streamlined, while contour feathers show more texture, and the throat hackles display a distinctly shaggy appearance. Vary your stroke patterns and pressure to differentiate these feather groups effectively.
Ignoring light direction leads to inconsistent shadows that destroy the three-dimensional quality of your drawing. Establish a single light source early in your composition and maintain consistent shadow placement throughout all feather groups. This approach creates the depth and volume necessary for convincing raven illustrations.
Over-blending textures eliminates the natural variation that gives raven feathers their realistic appearance. Leave some individual strokes visible to suggest the layered structure of feathers, and use blending tools sparingly to maintain texture definition.
Reference Photo Dependency Issues
Single photo reliance limits your understanding of raven anatomy and behavior patterns. We recommend collecting multiple reference images showing different angles, lighting conditions, and poses to develop a comprehensive understanding of raven characteristics. This approach prevents the mechanical copying that produces stiff, lifeless drawings.
Low resolution image usage compromises detail accuracy in critical areas like eye structure and feather patterns. Source high-quality photographs from reputable wildlife photography websites or create your own reference materials through field observation and sketching.
Ignoring behavioral context results in anatomically correct but emotionally flat raven portrayals. Study how ravens position their bodies during different activities like feeding, calling, or interacting with other birds. Understanding these behavioral nuances adds authenticity and life to your artwork.
Copying lighting conditions blindly from reference photos can create inconsistent results when the lighting doesn’t match your artistic vision. Analyze the light direction and quality in your references, then adapt these elements to serve your composition rather than simply replicating them exactly.
Advanced Techniques for Professional Raven Drawings

Professional raven drawing techniques elevate your artwork from basic studies to compelling, gallery-worthy pieces. We’ll explore sophisticated methods that bring depth, texture, and atmospheric quality to your raven illustrations.
Cross-Hatching Methods
Cross-hatching creates the rich, varied tones essential for capturing raven plumage complexity. We start with parallel lines drawn in one direction across feather areas, then add perpendicular lines to build darker values. Varying the spacing between lines controls tone intensity—closer lines produce deeper shadows while wider spacing creates mid-tones.
Directional cross-hatching follows feather growth patterns to enhance realism. We angle our strokes to match how feathers naturally lay on the raven’s body, creating lines that curve around the breast and follow the wing’s contours. This technique particularly excels when rendering the throat’s shaggy feathers where multiple directions intersect.
Graduated cross-hatching transitions smoothly from light to dark areas across the raven’s form. We begin with light, sparse lines in highlighted regions and gradually increase density and add additional layers as we move toward shadow areas. The neck’s glossy feathers benefit from this approach, showing how light reflects off their iridescent surface.
Contour cross-hatching wraps around the raven’s three-dimensional form to emphasize volume. We curve our hatching lines to follow the bird’s anatomical structure, particularly effective around the head’s rounded shape and the body’s cylindrical mass. This method creates convincing depth without relying solely on solid shading.
Blending and Smudging Approaches
Blending techniques create the smooth, lustrous quality characteristic of healthy raven feathers. We use blending stumps to merge graphite layers gradually, working in circular motions to eliminate harsh lines and create seamless transitions. The raven’s head feathers respond particularly well to this treatment, achieving that polished, intelligent appearance.
Finger blending provides subtle control for large areas like the raven’s body mass and wing surfaces. We apply gentle pressure with our fingertip to soften pencil marks while maintaining the underlying texture. This approach works best on areas where feathers lie flat against the body, creating that characteristic sleek raven silhouette.
Tissue blending offers precise control for delicate areas around the raven’s eye and beak details. We wrap tissue around our finger or use cotton swabs to blend small sections without disturbing surrounding work. The eye area particularly benefits from this technique, allowing us to create smooth gradations around the iris and the subtle shadows cast by the brow.
Strategic smudging preserves important texture while smoothing others. We selectively blend certain feather groups while leaving others with visible pencil strokes, creating visual hierarchy and preventing the drawing from appearing too uniform. Wing primaries might retain some texture while the head receives more thorough blending.
Adding Environmental Context
Environmental elements transform isolated raven studies into complete compositions that tell stories. We incorporate perching surfaces like weathered fence posts, gnarled tree branches, or rocky outcrops that complement the raven’s rugged character. These surfaces provide opportunities to showcase textural variety while supporting the narrative.
Atmospheric perspective adds depth to raven drawings by suggesting distance and space. We render background elements with lighter values and less detail than foreground subjects, creating the illusion of depth. Distant trees or mountain ranges fade into softer tones, making our detailed raven appear more prominent and three-dimensional.
Weather conditions enhance mood and provide ever-changing opportunities in raven compositions. We might add falling snow using negative space techniques, or suggest wind through the raven’s feather position and any background vegetation. Rain effects created with diagonal lines can add drama while highlighting the raven’s resilient nature.
Lighting scenarios establish time of day and emotional tone throughout our raven artwork. We consider how golden hour light creates warm highlights on glossy feathers, or how overcast conditions produce even, diffused lighting that emphasizes form over dramatic contrast. Backlighting can create striking silhouettes that emphasize the raven’s distinctive profile and commanding presence.
Conclusion
Drawing ravens offers us an incredible opportunity to explore the intersection of technical skill and artistic expression. These remarkable birds challenge us to master complex techniques while rewarding our efforts with stunning visual results.
We’ve covered everything from basic proportions to advanced shading methods that’ll help you create compelling raven artwork. Remember that consistent practice with quality reference materials is your key to success.
Whether you’re sketching your first raven or perfecting professional-level illustrations your journey with these magnificent creatures will continually teach you new artistic lessons. Each drawing becomes a step toward mastering one of nature’s most captivating subjects.
Start with simple shapes and gradually build your skills – soon you’ll be creating raven drawings that capture both their physical beauty and mysterious presence.
Frequently Asked Questions
What makes ravens particularly challenging to draw?
Ravens present unique artistic challenges due to their glossy, iridescent black plumage that requires mastery of light and shadow techniques. Their complex anatomy, including distinctive features like wedge-shaped bills, flat-topped heads, and shaggy throat feathers, demands attention to detail. Additionally, capturing their intelligent expressions and dynamic poses while maintaining proper proportions adds complexity to the drawing process.
What reference materials should I use for drawing ravens?
High-quality photography from sources like the Audubon Society and National Geographic provides excellent references. Local bird photography groups and social media platforms offer contemporary images. Field sketching from direct observation is invaluable for understanding raven behavior. Digital reference collections using tools like Pinterest and Adobe Lightroom help organize materials efficiently for easy access during drawing sessions.
What drawing supplies work best for raven artwork?
For traditional drawing, use various grades of graphite pencils (2H to 6B), blending stumps, and charcoal for rich blacks. Quality paper with appropriate texture enhances results. Digital artists benefit from software like Adobe Photoshop or Procreate with drawing tablets for precise control. Choose materials that allow you to achieve the deep blacks and subtle details characteristic of raven plumage.
How do I get raven proportions correct?
Start by breaking ravens into basic geometric shapes: ovals for body and head, triangles for beak and tail. Maintain proper head-to-body ratios and accurate wingspan measurements. The head should be proportional to the robust body, with the beak length matching the head width. Establish guidelines for eye placement and wing attachment points to ensure natural, well-proportioned representations.
What’s the key to realistic raven feather textures?
Use directional strokes that follow natural feather growth patterns and vary stroke pressure to create depth. Layer feathers properly, understanding the overlap of primary, secondary, and tertiary feathers. Master crosshatching techniques for rich tones and use blending stumps for smooth transitions. Strategic highlighting with kneaded erasers helps separate feather layers and adds dimensionality to your artwork.
How can I draw ravens in dynamic poses?
Study raven anatomy in various positions: perched (showing alertness), flying (understanding wing mechanics), and ground feeding (unique foraging postures). Focus on wing positioning during different flight phases like soaring and banking. Observe how their body language changes with different behaviors. Practice gesture sketches to capture movement and flow before adding detailed features.
What common mistakes should I avoid when drawing ravens?
Avoid proportion errors like incorrect head-to-body ratios, overly small beaks, or inaccurate wing spans. Don’t rely on single reference photos or treat all feathers uniformly. Maintain consistent light direction throughout your drawing and vary feather textures appropriately. Ensure proper contrast between different areas and avoid making the entire bird uniformly black without considering light interaction.
How do I achieve professional-quality raven drawings?
Master advanced techniques like graduated cross-hatching that follows feather patterns and sophisticated blending for lustrous plumage effects. Add environmental context such as perching surfaces and atmospheric perspective. Consider lighting scenarios to establish mood and time of day. Focus on creating depth through strategic contrast and incorporate storytelling elements to elevate your artwork beyond simple bird studies.