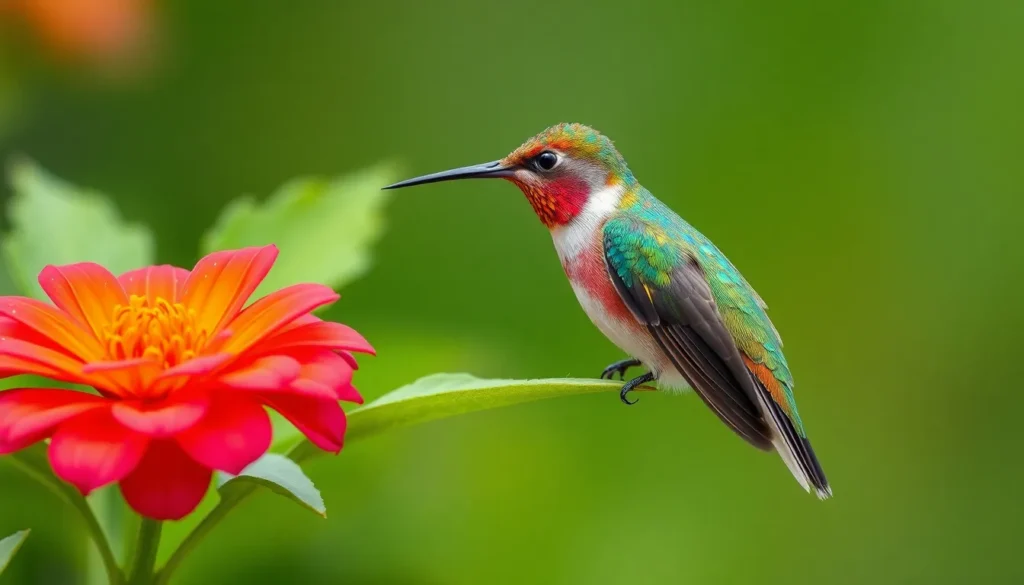
We’ve all been captivated by the magical moment when a hummingbird hovers near our garden, its iridescent feathers catching the sunlight like tiny jewels. These remarkable creatures move so quickly that capturing their beauty in a photograph feels almost impossible – yet when we succeed, the results are absolutely breathtaking.
Hummingbird photography has become one of the most rewarding and challenging pursuits for nature enthusiasts and professional photographers alike. Whether you’re using a smartphone or a high-end DSLR camera, learning the right techniques can transform fleeting glimpses into stunning visual masterpieces that showcase every detail of these aerial acrobats.
We’ll explore the secrets behind creating captivating hummingbird pictures that not only freeze their lightning-fast movements but also reveal the incredible intricacy of their design. From understanding their behavior patterns to mastering camera settings, we’re about to unlock the techniques that’ll elevate your hummingbird photography from ordinary snapshots to gallery-worthy art pieces.
Capturing the Perfect Hummingbird Picture: Essential Equipment and Settings
Success in hummingbird photography depends heavily on having the right gear and knowing how to configure it properly. We’ll explore the essential equipment and camera settings that make the difference between blurry disappointments and breathtaking hummingbird pictures.
Camera Types Best Suited for Hummingbird Photography
DSLR cameras remain our top choice for capturing stunning hummingbird pictures due to their superior autofocus speed and battery life. Canon EOS 7D Mark II and Nikon D500 offer continuous shooting rates of 10 frames per second, which proves crucial when photographing these rapid fliers. Professional photographers often prefer these models because they handle the demanding burst shooting requirements without overheating.
Mirrorless cameras have become increasingly popular among hummingbird enthusiasts for their lightweight design and silent shooting modes. Sony Alpha a7R IV and Fujifilm X-T4 provide excellent image quality while reducing the bulk we need to carry during extended field sessions. These cameras excel in situations where we want to avoid startling sensitive hummingbirds with shutter noise.
Point and shoot cameras with superzoom capabilities offer convenience for beginners who want to capture hummingbird pictures without investing in multiple lenses. Canon PowerShot SX70 HS and Nikon COOLPIX P1000 provide impressive zoom ranges that let us maintain respectful distances from our subjects while still filling the frame.
Lens Selection for Sharp Hummingbird Images
Telephoto lenses in the 300-600mm range give us the reach needed to capture detailed hummingbird pictures without disturbing their natural behavior. Canon EF 100-400mm f/4.5-5.6L IS USM and Nikon AF-S NIKKOR 200-500mm f/5.6E ED VR offer excellent image stabilization that compensates for the inevitable camera shake during handheld shooting sessions.
Prime lenses like the 400mm f/2.8 or 600mm f/4 provide superior sharpness and wider apertures for better subject isolation. These professional grade lenses cost significantly more but deliver unmatched image quality that makes every hummingbird picture appear magazine ready. Wildlife photographers who specialize in bird photography often consider these lenses essential investments.
Macro lenses work exceptionally well when we can position ourselves close to reliable feeding stations or nesting sites. Canon EF 100mm f/2.8L Macro IS USM and Nikon AF-S VR Micro-Nikkor 105mm f/2.8G IF-ED capture incredible detail in hummingbird feathers and allow us to showcase the intricate patterns that make each species unique.
Optimal Camera Settings for Fast-Moving Subjects
Shutter speed settings of 1/1000th of a second or faster freeze hummingbird wing motion effectively in most lighting conditions. Professional wildlife photographers recommend starting at 1/2000th of a second and adjusting based on the exact behavior we’re trying to capture. Hovering hummingbirds require slightly slower speeds around 1/500th of a second to show subtle wing blur that conveys motion.
Aperture settings between f/5.6 and f/8 provide the optimal balance of depth of field and shutter speed for sharp hummingbird pictures. These settings ensure adequate depth to keep the entire bird in focus while maintaining fast enough shutter speeds to freeze motion. Wider apertures like f/4 work well for isolating single birds against blurred backgrounds.
ISO performance becomes critical when shooting in early morning or late afternoon light when hummingbirds are most active. Modern cameras handle ISO 1600-3200 beautifully, allowing us to maintain fast shutter speeds without excessive noise. We avoid going above ISO 6400 unless absolutely necessary to preserve image quality in our hummingbird pictures.
Autofocus modes should be set to continuous AF (AI Servo for Canon or AF-C for Nikon) to track moving hummingbirds effectively. Single point autofocus gives us precise control over focus placement, while zone or group area modes help when birds move unpredictably within the frame. Back button focus technique allows us to separate focus and shutter functions for more control during critical moments.
Creating the Ideal Environment for Stunning Hummingbird Pictures

Setting up the perfect environment is crucial for capturing breathtaking hummingbird photographs. We’ll transform your backyard or photography location into a hummingbird haven that delivers professional-quality shots.
Strategic Feeder Placement for Photography Success
Position feeders 8-12 feet from your camera setup to achieve optimal focus distance while maintaining comfortable shooting angles. This distance allows telephoto lenses to capture sharp details without startling these sensitive birds during feeding sessions.
Install multiple feeders at varying heights to create diverse photographic compositions and accommodate different hummingbird species’ preferences. Place primary feeders at eye level (approximately 5-6 feet high) for easier tracking and secondary feeders 2-3 feet higher to capture ever-changing flight patterns.
Angle feeders perpendicular to your shooting position rather than facing directly toward or away from the camera lens. This positioning showcases the birds’ profiles and allows natural light to illuminate their iridescent feathers more effectively.
Create feeder clusters with 3-4 feet spacing to encourage territorial behavior and capture dramatic interaction shots between competing hummingbirds. These behavioral displays often produce the most compelling action sequences for wildlife photography portfolios.
Remove feeders 2-3 hours before planned shooting sessions to increase hunger motivation and ensure birds return quickly when feeders reappear. This technique concentrates feeding activity during your designated photography window.
Lighting Considerations for Vibrant Hummingbird Colors
Shoot during golden hour periods (30 minutes after sunrise and before sunset) when warm light enhances the metallic sheen of hummingbird feathers. Natural side lighting during these times creates dimensional depth and brings out the brilliant greens, reds, and blues in their plumage.
Avoid harsh midday sun that creates unflattering shadows under birds’ heads and washes out delicate feather details. Overcast conditions provide even diffused lighting that maintains color saturation while eliminating harsh contrast issues.
Use reflectors positioned 45 degrees to your left or right to bounce soft fill light onto shadowed areas of perched hummingbirds. White foam boards or professional photography reflectors work effectively for this purpose without disturbing the birds.
Experiment with backlighting techniques to create stunning silhouettes and highlight translucent wing membranes during hovering sequences. Position yourself so morning or evening sun filters through the birds’ wings for ethereal glowing effects.
Consider portable LED panels for consistent illumination during early morning or late evening sessions when natural light becomes insufficient. Modern LED lights produce daylight-balanced output that preserves natural color temperatures.
Background Selection to Make Your Hummingbird Picture Pop
Choose solid color backgrounds that contrast dramatically with hummingbird plumage to create striking visual separation. Dark green foliage works exceptionally well for ruby-throated and broad-tailed species, while blue sky backgrounds complement Anna’s and Allen’s hummingbirds.
Position flowering plants 6-8 feet behind feeders to create natural bokeh effects that blur distracting elements while maintaining environmental context. Native flowers like bee balm, cardinal flower, and trumpet vine provide authentic habitat settings.
Eliminate cluttered branch patterns and busy backgrounds that compete with your main subject for viewer attention. Clean backgrounds direct focus immediately to the hummingbird and its intricate details.
Use portable fabric backdrops in neutral colors (black, deep blue, or forest green) when natural backgrounds prove too distracting. Professional wildlife photographers often employ collapsible backgrounds mounted on lightweight stands for complete creative control.
Create depth with layered vegetation by placing some plants close to the camera and others at varying distances behind the subject. This technique adds three-dimensional quality to images while maintaining natural environmental authenticity.
Mastering Timing and Positioning for Dynamic Hummingbird Pictures

Understanding when and where to position ourselves transforms ordinary hummingbird photography into extraordinary visual storytelling.
Understanding Hummingbird Flight Patterns and Behavior
Territorial behaviors reveal predictable movement patterns that we can anticipate and capture. Male hummingbirds establish feeding territories within a 50-foot radius around nectar sources, creating consistent flight paths between perches and feeders. These aerial highways offer us repeatable opportunities to frame perfect shots.
Hovering duration varies significantly between species and situations. Ruby-throated hummingbirds typically hover for 3-8 seconds at feeders, while Anna’s hummingbirds may extend their hovering time up to 15 seconds. We position our cameras along these predictable routes to capture extended feeding sequences.
Approach patterns follow distinct trajectories based on the bird’s comfort level with our presence. Newly arrived birds often circle feeders 2-3 times before landing, creating multiple shooting opportunities. Experienced visitors dive directly to their preferred feeding ports, requiring us to pre-focus on exact locations.
Defense postures create dramatic photo opportunities when multiple birds compete for territory. Aggressive displays include wing spreading, tail fanning, and chase sequences that produce ever-changing action shots. We anticipate these behaviors during peak feeding times when competition intensifies.
Peak Activity Times for Maximum Photo Opportunities
Dawn feeding sessions occur within the first 30-45 minutes after sunrise when hummingbirds replenish energy reserves depleted during overnight fasting. We arrive at our shooting locations 15 minutes before sunrise to capture these hungry birds in optimal natural lighting conditions.
Pre-storm activity increases dramatically as hummingbirds sense approaching weather changes through barometric pressure drops. These feeding frenzies occur 2-4 hours before storm systems arrive, creating exceptional opportunities for capturing multiple species simultaneously.
Seasonal migration peaks deliver extraordinary photo opportunities during exact timeframes throughout the year.
| Season | Peak Activity Period | Species Concentration |
|---|---|---|
| Spring | March 15 – April 30 | 15-25 birds per feeder |
| Summer | June 1 – July 15 | 8-12 resident pairs |
| Fall | August 20 – September 30 | 30-50 migrating birds |
Evening feeding intensifies during the final 2 hours before sunset as birds prepare for nighttime energy conservation. We position ourselves during these golden hour sessions to capture warm-toned portraits with dramatic backlighting effects.
Temperature-driven patterns influence activity levels throughout the day. Hummingbirds increase feeding frequency when temperatures drop below 50°F or exceed 85°F, requiring additional energy for thermoregulation.
Positioning Yourself for the Best Shooting Angles
Eye-level positioning creates intimate portraits that connect viewers emotionally with our subjects. We set up our cameras 3-4 feet above ground level to align with perching hummingbirds, eliminating awkward upward or downward viewing angles that diminish visual impact.
Diagonal shooting angles add visual dynamism to static feeding shots by creating leading lines through the bird’s body positioning. We position ourselves 45 degrees off-center from feeders rather than shooting directly head-on for more captivating compositions.
Background separation distances determine the quality of bokeh effects in our final images. Maintaining 15-20 feet between our subjects and background elements ensures complete background blur at f/5.6 aperture settings, making hummingbirds appear to float in soft, dreamy environments.
Multiple position setups allow us to capture varied perspectives without disturbing feeding patterns. We establish 3-4 shooting positions around feeder areas, rotating locations every 20-30 minutes to maintain fresh angles while giving birds time to readjust to our presence.
Wind direction considerations affect both bird flight patterns and our shooting stability. We position ourselves with crosswinds rather than headwinds to minimize camera shake while allowing hummingbirds to use air currents for efficient hovering and maneuvering during their feeding sessions.
Post-Processing Techniques to Enhance Your Hummingbird Picture

Capturing the perfect hummingbird shot in the field is just the beginning of creating truly spectacular imagery. Post-processing techniques can transform your raw hummingbird pictures into breathtaking masterpieces that showcase every detail and color with stunning clarity.
Color Correction for True-to-Life Hummingbird Plumage
Temperature adjustments form the foundation of accurate hummingbird color reproduction in your digital images. We recommend starting with subtle temperature shifts between 5200K and 5800K to neutralize any color casts from artificial lighting or shade conditions. Morning shots often require warming adjustments of +200 to +400K to counteract the cool blue tones from early daylight.
Vibrance controls excel at improving the iridescent qualities of hummingbird feathers without oversaturating skin tones or background elements. Adobe Lightroom’s vibrance slider typically works best at +20 to +40 settings for ruby throated hummingbirds and +30 to +50 for more colorful species like Anna’s hummingbirds. This selective enhancement preserves the natural luminosity that makes hummingbird plumage appear to glow.
HSL adjustments allow precise targeting of exact color ranges within your hummingbird picture composition. Green adjustments affect the bird’s back coloring and surrounding foliage while red modifications impact throat patches and flower elements. We’ve found that increasing luminance in the red range by +15 to +25 creates more dramatic throat displays without affecting other image areas.
Shadow and highlight recovery reveals details lost in high contrast situations common with backlit hummingbird photography. Lifting shadows by +30 to +60 brings out subtle feather textures while pulling highlights down by −20 to −40 prevents blown out wing details during flight captures.
Sharpening Methods for Crystal Clear Details
Unsharp mask techniques provide foundational sharpening for hummingbird images with precise control over three key parameters. We apply amounts between 80 and 120 percent with radius settings of 1.0 to 1.5 pixels for optimal feather detail enhancement. Threshold values of 2 to 4 prevent sharpening of smooth background areas while targeting the textured surfaces of hummingbird plumage.
High pass filtering creates professional level sharpening through layer blending modes in Photoshop applications. Duplicate your hummingbird layer and apply a high pass filter with radius settings between 1.5 and 3.0 pixels depending on image resolution. Set the blend mode to Overlay or Soft Light at 50 to 75 percent opacity for subtle yet effective sharpening results.
Selective sharpening masks target only the hummingbird while leaving background elements untouched for more natural looking results. Create luminosity masks that isolate the bird’s body and apply sharpening exclusively to these areas. This approach prevents oversharpening of out of focus backgrounds that can create distracting halos or noise.
Edge enhancement techniques emphasize the crisp boundaries between hummingbird features and surrounding elements. Structure adjustments in Lightroom’s Detail panel work exceptionally well at +25 to +40 values for bringing out individual feather separation. Clarity adjustments between +10 and +20 add micro contrast that makes hummingbird eyes and beak details pop from the composition.
Cropping Strategies to Improve Composition
Rule of thirds positioning transforms centered hummingbird shots into more ever-changing and visually captivating compositions. Place the bird’s eye or head at intersection points of imaginary grid lines for immediate visual improvement. Off center positioning creates natural leading room that suggests movement and direction within your hummingbird picture frame.
Aspect ratio considerations dramatically affect the emotional impact and storytelling potential of your hummingbird images. Square crops work beautifully for hovering shots that emphasize symmetrical wing positions while vertical orientations suit feeding behaviors and flower interactions. Panoramic crops at 16:9 ratios excel for flight sequences and territorial displays.
Negative space utilization provides breathing room that allows hummingbird subjects to command attention without feeling cramped or constrained. Leave 30 to 40 percent of your frame empty around flying birds to suggest movement and freedom. Feeding shots benefit from tighter crops that eliminate distracting elements while maintaining enough context to tell the story.
Background simplification through strategic cropping removes cluttered elements that compete with your hummingbird subject for viewer attention. Crop out partially visible branches, conflicting colors, or busy patterns that don’t contribute to the overall narrative. Clean backgrounds achieved through thoughtful cropping create professional looking results that rival gallery worthy wildlife photography.
Common Mistakes to Avoid When Taking Hummingbird Pictures

Even experienced photographers can fall into traps that diminish the impact of their hummingbird images. Understanding these pitfalls helps us create more compelling photographs that truly showcase these remarkable birds.
Overcrowded Compositions That Distract from the Subject
Cluttered backgrounds ruin otherwise perfect hummingbird shots by drawing attention away from our main subject. Busy garden scenes with multiple feeders, overlapping branches, and scattered decorative elements create visual chaos that overwhelms the delicate beauty of the bird.
Multiple birds in a single frame often compete for attention rather than creating harmony. We’ve found that including 2-3 hummingbirds simultaneously requires careful spacing of at least 6 inches between subjects to maintain individual focus. Single bird compositions typically produce stronger emotional connections with viewers.
Excessive props like artificial flowers, decorative perches, or ornamental elements can make images appear staged and unnatural. Natural perches such as bare branches or garden stems provide cleaner compositions that highlight the hummingbird’s authentic behavior.
Foreground distractions including fence posts, garden tools, or house structures can slice through the frame and interrupt the visual flow. Positioning ourselves at different angles helps eliminate these unwanted elements from our composition.
Motion Blur Issues and How to Prevent Them
Insufficient shutter speeds cause wing blur that destroys the crisp detail we’re seeking in hummingbird photography. Shooting below 1/1000th of a second frequently results in blurred wing movements, even when the body appears sharp.
Camera shake from handheld shooting introduces unwanted blur throughout the entire image. Using tripods or monopods stabilizes our equipment, especially when working with telephoto lenses exceeding 300mm focal length.
Focus tracking failures occur when we rely on single point autofocus instead of continuous tracking modes. Switching to AI Servo (Canon) or AF-C (Nikon) allows our camera to follow the bird’s rapid movements more effectively.
Improper burst mode settings limit our chances of capturing sharp images during critical moments. Configuring high-speed continuous shooting at 8-12 frames per second increases our success rate for freezing wing positions at optimal angles.
Wind interference causes both subject movement and camera shake that’s often overlooked. Shooting during calmer morning hours or using faster shutter speeds of 1/2000th second compensates for environmental motion factors.
Flash Photography Errors That Harm Image Quality
Direct flash usage creates harsh shadows and eliminates the natural lighting that makes hummingbird plumage sparkle. Built-in camera flashes produce flat, lifeless images that fail to capture the iridescent qualities of hummingbird feathers.
Overexposed highlights result from excessive flash power settings that blow out the delicate details in white throat patches and breast areas. Reducing flash output to -1 or -2 stops helps maintain detail in these critical areas.
Unnatural color casts appear when flash color temperature doesn’t match ambient lighting conditions. Daylight-balanced flash units prevent the blue-green tints that often plague indoor or shaded outdoor shooting scenarios.
Red-eye effects in hummingbirds manifest as unnatural bright spots in their tiny eyes, creating an artificial appearance. Bouncing flash off nearby surfaces or using diffusion panels softens the light and preserves natural eye coloration.
Flash recycle delays cause missed opportunities when shooting in burst mode, as most built-in flashes can’t keep up with rapid frame rates. External flash units with faster recycle times of 0.1-0.5 seconds provide consistent illumination for multiple exposures.
Creative Composition Ideas for Memorable Hummingbird Pictures

Transforming ordinary hummingbird snapshots into compelling visual narratives requires strategic composition techniques that go beyond basic camera settings. We’ll explore artistic approaches that elevate your hummingbird photography from simple documentation to captivating imagery.
Rule of Thirds Application in Hummingbird Photography
Positioning hummingbirds along the rule of thirds grid creates visually balanced and captivating photographs. We recommend placing the bird’s eye at one of the four intersection points rather than centering the subject. This technique draws viewers into the frame naturally while creating ever-changing tension.
Moving subjects benefit from directional space when applying the rule of thirds. We suggest positioning flying hummingbirds in the left or right third of the frame with ample space in their flight direction. This composition technique creates a sense of movement and anticipation.
Vertical orientation works exceptionally well for hovering hummingbirds using rule of thirds placement. We position the bird in the upper or lower third while including feeding sources like flowers or feeders in the opposite section. This approach creates depth and context within the frame.
Multiple hummingbirds require careful grid placement to maintain visual hierarchy. We suggest positioning the primary subject at a strong intersection point while allowing secondary birds to occupy supporting areas of the composition. This prevents competing focal points that can confuse viewers.
Incorporating Natural Elements for Artistic Appeal
Flowering plants serve as powerful foreground elements that frame hummingbird subjects beautifully. We recommend using trumpet vine, bee balm, and cardinal flower as natural compositional tools. These plants create colorful borders while maintaining focus on the primary subject.
Water droplets and morning dew add magical qualities to hummingbird portraits. We capture images during early morning hours when natural moisture clings to nearby vegetation. This technique creates sparkling highlights that enhance the overall visual appeal.
Branch perches provide opportunities for storytelling compositions that showcase natural behaviors. We position ourselves to capture hummingbirds resting on thin branches with complementary background elements. These moments reveal personality and create intimate connections with viewers.
Seasonal elements like autumn leaves or spring blossoms add temporal context to hummingbird images. We incorporate these natural frames to create environmental portraits that tell broader stories about habitat and timing. This approach transforms simple bird photos into seasonal narratives.
Capturing Unique Behaviors and Interactions
Territorial disputes create dramatic action sequences that showcase hummingbird personalities. We anticipate aggressive interactions near popular feeding stations and position ourselves to capture mid flight confrontations. These ever-changing moments reveal the fierce nature hidden within these tiny birds.
Feeding behaviors offer intimate glimpses into hummingbird survival strategies. We document tongue extension during nectar consumption and pollen collection on beaks and foreheads. These detailed behavioral shots provide educational value alongside artistic appeal.
Bathing sequences present opportunities for capturing vulnerable and endearing moments. We set up near shallow water sources like fountains or dripper systems to photograph splashing and preening behaviors. These intimate scenes reveal softer aspects of hummingbird life.
Mother and juvenile interactions create emotionally powerful images that resonate with viewers. We observe nesting areas from respectful distances to capture feeding exchanges and flight training sessions. These family moments showcase the nurturing side of these typically solitary creatures.
Courtship displays during breeding season offer spectacular photographic opportunities. We document elaborate aerial dances and territorial posturing that males perform to attract mates. These behaviors create ever-changing compositions filled with energy and purpose.
Seasonal Considerations for Year-Round Hummingbird Pictures

Each season brings distinct opportunities to capture hummingbird behavior and environmental interactions. We’ll explore how different times of year offer unique photographic possibilities that can transform your hummingbird picture collection.
Spring Migration Photography Opportunities
Spring migration creates some of the most ever-changing hummingbird picture opportunities of the entire year. Male Ruby-throated Hummingbirds arrive 5-7 days before females, establishing territories around fresh nectar sources and early flowering plants like azaleas and redbud trees.
Peak migration timing varies by species and location:
| Species | Peak Migration Period | Best Photography Locations |
|---|---|---|
| Ruby-throated | March 15 – May 10 | Eastern flyways, Gulf Coast |
| Anna’s | February 1 – April 15 | California coastal regions |
| Broad-tailed | April 20 – May 25 | Rocky Mountain corridors |
| Rufous | March 1 – May 15 | Pacific Northwest routes |
Fresh arrivals exhibit heightened territorial behavior as they compete for prime feeding locations. We recommend positioning cameras near flowering dogwood, serviceberry, and wild columbine to capture these intense interactions. Early morning shoots between 6:30-8:00 AM produce the most active behavioral displays when birds establish dominance hierarchies.
Migrating hummingbirds often appear more vibrant due to fresh plumage grown during winter months. Their gorgets display peak iridescence under optimal spring lighting conditions, making this season ideal for detailed portrait work and close-up feather photography.
Summer Breeding Season Behavioral Shots
Summer breeding season offers unparalleled access to intimate hummingbird family dynamics and courtship behaviors. Male territorial displays reach maximum intensity during June and July when females select nesting sites within established territories.
Courtship dives create spectacular photographic opportunities as males perform steep U-shaped flights reaching speeds of 60+ mph. We position ourselves 15-20 feet from known display areas using telephoto lenses to capture these dramatic aerial maneuvers without disturbing the natural behavior.
Prime summer behaviors to document include:
- Nest construction activities where females gather spider silk, moss, and lichen materials
- Feeding routines with parent birds visiting flowers every 10-15 minutes during peak daylight hours
- Territorial chases involving multiple species competing for established feeding territories
- Bathing rituals at shallow water features during afternoon heat periods
Juvenile birds appear in late July through August, offering opportunities to photograph learning behaviors and parent-offspring interactions. Young hummingbirds practice hovering techniques near safe perching spots, creating ideal scenarios for capturing developmental progression in a single hummingbird picture series.
Extended daylight hours allow for golden hour shooting sessions that can last 90+ minutes, providing optimal lighting for detailed behavioral documentation and environmental context shots.
Fall Preparation Activities Worth Capturing
Fall preparation behaviors transform hummingbird photography as birds focus intensively on building fat reserves for upcoming migrations. We observe feeding frenzies during September and October when birds consume 50% more nectar than summer averages to fuel long-distance journeys.
Late-blooming flowers like cardinal flower, bee balm, and jewelweed create vibrant autumn backgrounds for hummingbird pictures. These native plants provide essential nutrition while offering rich red and orange tones that complement bird plumage colors naturally.
Migration preparation activities include:
- Hyperactive feeding with individual birds visiting 1,500+ flowers daily
- Territorial relaxation as dominance behaviors decrease before departure
- Preening intensification to optimize feather condition for long flights
- Route testing with short exploratory flights to assess weather conditions
Weather pattern photography becomes crucial during fall months as hummingbirds respond to barometric pressure changes and approaching cold fronts. We capture pre-storm feeding bursts when birds sense incoming weather systems 24-48 hours in advance.
Juvenile birds attempting first migrations provide compelling subject matter as they navigate feeding stations with less efficiency than experienced adults. Their learning curves create opportunities for sequential behavioral photography that documents skill development over multiple shooting sessions.
Final departure dates vary significantly by species, with Ruby-throated Hummingbirds leaving northern regions by late September while Anna’s Hummingbirds remain year-round in moderate climates.
Conclusion
We’ve covered everything you need to transform your hummingbird photography from amateur snapshots to professional-quality images. With the right equipment understanding and environmental setup we’ve discussed you’re well-equipped to capture these magnificent creatures in their full glory.
Remember that mastering hummingbird photography takes patience and practice. The seasonal insights and creative techniques we’ve shared will help you build a diverse portfolio throughout the year while avoiding common pitfalls that many photographers encounter.
Your journey into hummingbird photography starts now. Apply these proven strategies we’ve outlined and you’ll soon discover the incredible satisfaction of creating stunning images that showcase nature’s most captivating aerial performers.
Frequently Asked Questions
What camera equipment is best for hummingbird photography?
DSLR cameras like the Canon EOS 7D Mark II and Nikon D500 are excellent choices due to their fast autofocus and continuous shooting capabilities. Mirrorless cameras such as the Sony Alpha a7R IV and Fujifilm X-T4 offer lightweight alternatives. For beginners, point-and-shoot cameras with superzoom features provide convenience. Pair your camera with telephoto lenses (300-600mm range) for detailed shots or macro lenses for close-up feeding station photography.
What camera settings work best for photographing hummingbirds?
Use shutter speeds of 1/1000th of a second or faster to freeze their rapid wing movement. Set aperture between f/5.6 and f/8 for optimal depth of field and sharpness. Keep ISO as low as possible while maintaining proper exposure to reduce noise. Enable continuous autofocus mode to track their dynamic movements effectively. These settings help capture sharp, well-exposed images of these fast-moving subjects.
How should I position hummingbird feeders for photography?
Place feeders 8-12 feet from your camera position for optimal focus and framing. Use multiple feeders at varying heights to attract different species and create diverse shooting opportunities. Position feeders where they’ll receive soft, natural lighting during golden hours. Ensure the background behind feeders is clean and contrasts well with the birds’ colorful plumage for better subject separation.
When is the best time to photograph hummingbirds?
Dawn and dusk during golden hours provide the most flattering natural lighting. Peak activity occurs during early morning feeding sessions and pre-storm feeding frenzies. Spring migration offers opportunities to capture territorial behaviors and vibrant plumage. Summer provides intimate family dynamics and courtship displays. Fall features increased feeding activity as birds prepare for migration, creating excellent action photography opportunities.
What post-processing techniques enhance hummingbird photos?
Adjust temperature and vibrance controls to enhance the iridescent qualities of their feathers while maintaining natural colors. Use HSL adjustments to fine-tune specific color ranges. Apply shadow/highlight recovery to reveal details in high-contrast situations. Sharpen images using unsharp mask or high pass filtering techniques. Crop strategically using rule of thirds positioning and consider aspect ratios to improve overall composition and visual impact.
What common mistakes should I avoid in hummingbird photography?
Avoid overcrowded compositions with excessive props that distract from the subject. Don’t use shutter speeds that are too slow, causing motion blur in wings and body. Prevent camera shake by using proper stabilization techniques. Avoid harsh flash photography that creates unnatural shadows and color casts. Keep backgrounds clean and uncluttered to maintain focus on the hummingbird. Position yourself to avoid foreground distractions that interrupt visual flow.