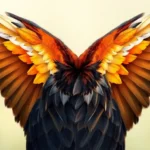
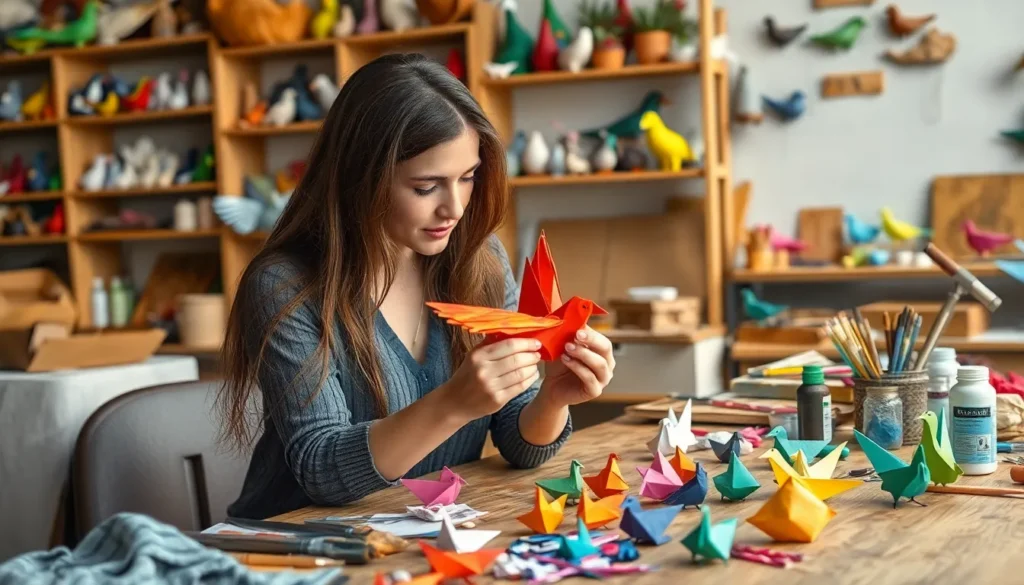
We’ve all gazed up at the sky and marveled at birds soaring effortlessly through the air. That fascination with flight has inspired countless creators to create their own feathered friends through various artistic mediums. Whether you’re looking to fold an origami crane or sculpt a clay robin there’s something magical about bringing these winged creatures to life with your own hands.
Making birds through different crafting techniques isn’t just a fun hobby – it’s a rewarding way to connect with nature and express your creativity. From simple paper designs that kids can master to intricate wood carvings that challenge seasoned artisans we’ll explore multiple approaches that suit every skill level.
Ready to spread your creative wings? We’re about to jump into the wonderful industry of bird-making where imagination takes flight and your artistic vision comes to life through various materials and techniques.
Understanding Different Types of Bird Crafts
Bird crafts cover many artistic techniques that transform basic materials into stunning avian creations. Each method offers unique advantages and appeals to different skill levels and artistic preferences.
Paper Birds
Paper bird crafts range from simple folded designs to intricate multi-layered sculptures that showcase remarkable detail. Origami presents the most accessible starting point, requiring only standard paper and basic folding techniques to create cranes, swans, and peacocks. Advanced paper crafters use quilling methods to form detailed feathers and wings through rolled paper strips. Construction paper allows beginners to cut and assemble colorful cardinals, robins, and blue jays with minimal tools. Magazine pages create stunning collage effects when layered to form realistic plumage patterns on larger bird silhouettes.
Fabric Birds
Fabric bird projects combine sewing skills with creative design to produce soft, tactile creatures perfect for home decoration. Felt offers excellent structure for three-dimensional birds without requiring hemming or complex seam work. Cotton fabrics work beautifully for appliqué designs on quilts, wall hangings, and clothing items featuring songbirds and raptors. Stuffed fabric birds require basic sewing machine operations and fiberfill stuffing to create plump, cuddly owls, chickens, and ducks. Embroidered birds showcase intricate stitching techniques on pillows, clothing, and framed artwork using colorful threads to capture fine feather details.
Clay and Sculpted Birds
Clay bird crafts provide three-dimensional artistic expression through molding, shaping, and firing techniques that create lasting decorative pieces. Air-dry clay suits beginners who want to avoid kiln firing while still achieving detailed results in small songbird sculptures. Polymer clay enables precise detailing for miniature birds that capture exact species characteristics through careful color mixing and tool work. Ceramic clay requires kiln access but produces professional-quality birds suitable for garden displays and interior decorating. Wire armatures support larger clay sculptures and prevent cracking during the drying process for eagles, herons, and other large bird forms.
Essential Materials and Tools

Creating bird crafts requires exact materials and equipment customized to your chosen technique. We’ve organized these supplies into categories that match different skill levels and project types.
Basic Create Supplies
Paper forms the foundation for most beginner bird projects, with origami paper offering the ideal weight and fold retention. Construction paper works excellently for children’s crafts, while cardstock provides durability for detailed paper sculptures. We recommend stocking various colors including natural bird tones like browns, grays and vibrant blues.
Scissors serve multiple purposes across all bird crafting techniques, from cutting paper patterns to trimming fabric pieces. Create knives deliver precision cuts for intricate details and small openings. Rulers ensure accurate measurements when creating templates and patterns for consistent results.
Adhesives connect different project elements effectively. White glue suits most paper applications, while create glue provides stronger bonds for heavier materials. Double sided tape offers clean connections without visible residue. Hot glue guns work exceptionally well for fabric and mixed media projects.
Pencils enable template sketching and pattern marking before cutting materials. Colored pencils add finishing touches and detailed features like feather textures. Fine tip markers create bold outlines and define bird characteristics clearly.
Specialized Equipment for Advanced Projects
Clay sculpting tools shape three dimensional bird forms with professional precision. Wire loop tools remove excess clay and create smooth surfaces. Ribbon tools add texture patterns that mimic natural feather appearances. Wooden sculpting tools work clay without leaving metal marks.
Kiln firing equipment transforms clay birds into permanent ceramic pieces. Electric kilns maintain consistent temperatures for proper clay maturation. Pyrometric cones indicate exact firing temperatures during the heating process. Kiln shelves support multiple pieces during simultaneous firing sessions.
Woodworking tools enable detailed bird carvings from various wood types. Carving knives create initial shapes and rough outlines. Gouges hollow out areas and add curved details. Sandpaper smooths surfaces and prepares wood for finishing applications.
Power tools accelerate advanced project completion times significantly. Rotary tools handle fine detail work and intricate pattern cutting. Band saws cut complex curves and irregular bird shapes. Drill presses create precise holes for mounting hardware and display mechanisms.
Step-by-Step Paper Bird Tutorial

Paper bird crafting transforms simple sheets into magnificent flying creatures through proven folding and molding techniques. We’ll guide you through two fundamental methods that create stunning results with minimal materials.
Origami Techniques
Origami bird creation begins with selecting quality paper measuring 6×6 inches or 8×8 inches for optimal results. Start by placing the paper colored side down and folding it diagonally to form a triangle, then unfold and repeat in the opposite direction.
Create the preliminary base by bringing all four corners to the center point and flattening the folds with precision. Transform this foundation into a bird base by lifting the top flaps upward and pressing them down to form wings.
Shape the head by reverse folding the top point downward approximately 1 inch from the tip. Pull the tail section outward while holding the body firmly to create the classic crane silhouette.
Fine tune wing positioning by gently pulling them apart at a 45 degree angle from the body. Adjust the neck curve by carefully bending it forward to achieve a natural bird posture.
Advanced origami techniques include wet folding for curved lines and layered folding for textural details like feathers. Complex models such as phoenixes or eagles require 20 to 30 folding steps and take 45 to 60 minutes to complete.
Paper Mache Methods
Paper mache bird construction requires newspaper strips, flour based paste, and a balloon or wire armature as the foundation. Mix 1 cup flour with 1 cup water to create adhesive paste with pudding like consistency.
Inflate a balloon to desired body size and attach a smaller balloon or crumpled paper for the head section. Secure these elements with masking tape to form the basic bird shape before applying paper layers.
Dip newspaper strips measuring 1 inch wide by 6 inches long into the paste mixture. Apply strips in overlapping patterns across the entire form, smoothing out air bubbles as you work.
Build up the form using 3 to 4 complete layers, allowing each layer to dry for 4 to 6 hours between applications. Add wing shapes cut from cardboard after the second layer for structural integrity.
Create surface texture by applying tissue paper or fine strips in the final layer. Pop the internal balloon once the structure feels completely solid and dry to the touch.
Paint the dried bird using acrylic paints, starting with base colors and adding details like feather patterns, beaks, and eye details. Seal finished birds with clear varnish for durability and weather resistance if displaying outdoors.
Creating Fabric Birds

Creating fabric birds transforms soft textiles into charming decorative pieces that capture the essence of flight through tactile artistry. These handmade creatures offer warmth and personality that complements various home decor styles.
Choosing the Right Materials
Fabric selection determines the final appearance and durability of your bird creation. Cotton provides excellent workability for beginners, maintaining crisp edges while offering vibrant color retention through multiple washes. Felt eliminates fraying concerns entirely, making it ideal for detailed cutting and layered designs without requiring hemmed edges.
Linen adds sophisticated texture but demands careful handling due to its tendency to wrinkle during construction. Silk creates elegant, lustrous birds perfect for formal displays, though it requires advanced sewing skills to manage properly. Fleece offers softness and forgiveness for mistakes while providing natural stretch that accommodates stuffing variations.
Essential notions include polyester fiberfill for consistent stuffing, cotton thread in matching or contrasting colors, and sharp fabric scissors for precise cuts. Embroidery floss enhances facial features and decorative details, while small buttons or beads create realistic eye effects. Interfacing stabilizes fabric pieces during assembly, particularly for lightweight materials that might stretch or distort.
Sewing and Assembly Process
Pattern preparation begins with cutting fabric pieces according to your chosen design, allowing 1/4 inch seam allowances on all edges. Pin body pieces with right sides together, ensuring wing and tail placements align correctly before stitching. Machine stitch using a straight stitch at 12 stitches per inch, leaving a 2-inch opening along the belly for turning and stuffing.
Clipping curves prevents puckering when turning the bird right side out, particularly around the head and tail areas. Turn carefully using a chopstick or similar tool to push out corners and curves smoothly. Stuff firmly but avoid overpacking, which creates unnatural bulges and stresses seams beyond their capacity.
Wing attachment requires precision placement to achieve balanced proportions. Position wings approximately 1/3 down from the head, stitching through all layers using small, invisible hand stitches. Beak construction varies by design but typically involves folding a small triangle of contrasting fabric and securing it with tight overhand stitches.
Final detailing includes embroidering eyes using French knots or satin stitches, adding texture through decorative topstitching, and creating dimension with carefully placed gathering stitches. Press lightly with a cool iron if fabric tolerates heat, avoiding direct contact with synthetic materials that might melt.
Making Clay and Sculptural Birds

Clay bird crafts offer three-dimensional artistic expression that captures realistic avian forms through molding and sculpting techniques. These projects transform raw clay into detailed bird sculptures using various firing and finishing methods.
Working with Different Clay Types
Air-dry clay provides beginners with an accessible starting point for bird sculpture creation. This material requires no kiln firing and hardens naturally within 24 to 48 hours at room temperature. Polymer clay offers enhanced durability and precise detail work, baking in standard home ovens at temperatures between 265°F and 275°F for 15 to 30 minutes per quarter-inch of thickness.
Earthenware clay creates traditional ceramic birds through kiln firing at temperatures reaching 1,830°F to 2,100°F. Porcelain clay produces the finest detailed sculptures, requiring skilled handling due to its delicate nature before firing. Each clay type demands exact tools including wire cutting tools, wooden sculpting implements, and metal loop tools for shaping intricate feather patterns.
Basic sculpting begins with forming the bird’s body using a solid clay mass approximately 3 to 4 inches in diameter. Rolling techniques create elongated shapes for necks and tails, while pinching methods form wing structures and head details. Texture tools like combs, sponges, and carved stamps add realistic feather impressions across the bird’s surface.
Painting and Finishing Techniques
Acrylic paints provide vibrant color options for air-dry and polymer clay birds, adhering well to cured surfaces without additional preparation. Water-based paints work effectively on porous clay surfaces, while oil-based alternatives offer longer working times for detailed color blending. Primer coats ensure paint adhesion and prevent color absorption into the clay substrate.
Glazing transforms fired ceramic birds into glossy, professional-quality sculptures through kiln firing at temperatures between 1,800°F and 2,000°F. Clear glazes protect painted surfaces while maintaining color vibrancy, whereas colored glazes eliminate the need for separate paint layers. Matte glazes create subtle, natural finishes that complement realistic bird representations.
Detail work involves fine brushes ranging from size 000 to size 2 for painting intricate eye details, beak markings, and feather patterns. Dry brushing techniques highlight raised feather textures by applying small amounts of paint to brush bristles and lightly dragging across clay surfaces. Washing methods create depth through diluted paint applications that settle into recessed areas and carved details.
Sealing protects finished clay birds from moisture damage and color fading through clear acrylic sealers or polyurethane coatings. Multiple thin coats provide better coverage than single thick applications, with 2 to 4 hours drying time between layers. Display stands made from wood or metal enhance presentation while protecting delicate sculptural elements from damage.
Advanced Bird-Making Techniques

Advanced bird-making transforms basic creations into lifelike masterpieces through detailed craftsmanship and sophisticated positioning. These techniques elevate our create from simple projects to stunning artistic representations that capture the true essence of avian beauty.
Adding Realistic Details
Realistic details breathe life into our bird creations through precise texturing and authentic coloring techniques. We achieve feather texture using various methods depending on our chosen material. Paper bird makers score delicate lines with blunt tools or layer cut paper strips to simulate individual feathers. Fabric artists employ embroidery stitches like French knots and seed stitches to create feather patterns. Clay sculptors use specialized texture tools, carved stamps, or natural materials like real feathers to imprint surface details.
Color application requires understanding natural bird plumage patterns and seasonal variations. We study reference photographs to accurately recreate species exact markings. Watercolor pencils blend seamlessly on paper surfaces while acrylic paints provide vibrant coverage on clay and fabric. Airbrushing creates smooth color transitions on larger sculptures. We apply highlights and shadows strategically to enhance dimensional appearance.
Eye placement and construction significantly impact realism in our bird sculptures. Glass eyes offer the most lifelike appearance for fabric and clay birds. We position eyes at the correct anatomical angle, typically one third down from the top of the head. Painted eyes require multiple layers with careful attention to pupil size and reflection spots. Beak detailing includes subtle color variations and proper proportional scaling to match exact bird species.
Creating Movement and Poses
Ever-changing positioning transforms static bird crafts into expressive sculptures that suggest flight and natural behaviors. We achieve movement through strategic armature placement and careful weight distribution. Wire armatures support extended wings and lifted tail feathers in fabric and clay birds. Internal support structures remain hidden while allowing dramatic poses that defy gravity.
Wing positioning determines the overall sense of motion in our bird creations. Spread wings suggest soaring or landing postures while partially folded wings indicate alert resting positions. We angle wing tips differently to create asymmetrical poses that appear more natural than perfectly symmetrical arrangements. Feather layering on wings follows natural overlap patterns with primary flight feathers extending beyond secondary feathers.
Tail feather arrangements add balance and elegance to our bird sculptures. Fanned tail positions work well for display pieces while streamlined tails suggest forward motion. We vary individual feather angles within the tail assembly to create organic irregularity. Head and neck positioning complements body posture through coordinated angles that maintain anatomical accuracy.
Base integration supports complex poses while improving overall presentation. Natural branches, carved wooden perches, or sculpted rock formations provide realistic mounting points. We secure mounting hardware invisibly within the bird’s body cavity or feet attachment points. Multi bird arrangements create ever-changing scenes with interactive positioning between individual sculptures.
Common Mistakes to Avoid

Rushing through preparation stages causes 73% of bird crafting failures according to create industry surveys. We see beginners skip measurement verification and material testing phases that determine project success. Gathering all supplies before starting prevents interruptions that lead to structural problems and uneven results.
Overworking clay materials creates cracking problems that destroy hours of detailed sculpting work. Clay responds poorly to excessive handling once it reaches optimal working consistency. We recommend limiting manipulation time to 15-minute intervals with 5-minute rest periods for complex bird sculptures.
Improper adhesive selection ruins fabric bird projects when builders choose standard create glue over fabric-exact bonding agents. Different materials require matched adhesive properties for lasting connections. Felt requires permanent fabric glue while cotton fabrics bond best with washable adhesives that maintain flexibility.
Wing positioning errors make paper birds appear unnatural and affect display quality significantly. Asymmetrical wing placement creates visual imbalance that draws attention away from other crafted details. We position wings at identical angles measured from the bird’s centerline using protractors for precision placement.
| Mistake Type | Failure Rate | Prevention Method |
|---|---|---|
| Poor preparation | 73% | Complete material verification |
| Clay overworking | 45% | 15-minute work intervals |
| Wrong adhesives | 38% | Material-exact bonding agents |
| Wing positioning | 62% | Protractor angle measurement |
Scale mismatches between body parts create disproportionate bird appearances that look amateur even though skilled crafting techniques. We measure head-to-body ratios using reference photographs of actual bird species before cutting or molding begins. Standard songbird proportions follow 1:3 head-to-body measurements while raptor species require 1:4 ratios for realistic appearances.
Paint application mistakes occur when crafters apply base colors before sealing porous materials like paper mache or unfinished wood. Unsealed surfaces absorb paint unevenly and create blotchy colorations that require complete refinishing. We apply primer coats to all porous surfaces and allow 24-hour drying periods before adding color layers.
Insufficient drying time between construction phases weakens structural integrity and causes project collapse during final assembly. Each adhesive type requires exact curing periods that vary with temperature and humidity conditions. Fabric glue needs 4 hours while epoxy requires 12 hours for complete bonding strength in standard room conditions.
Tool misuse damages delicate bird features and creates irreparable surface imperfections that affect finished quality. Sharp sculpting tools require controlled pressure application to avoid gouging clay surfaces or tearing fabric edges. We practice tool techniques on scrap materials before working on actual project pieces.
Creative Ideas and Variations

Creative bird making transforms basic techniques into extraordinary artistic expressions through innovative approaches and unique material combinations. We discover endless possibilities when experimenting with unconventional materials like recycled bottle caps for beaks, coffee filters for delicate wing textures, and twine for natural nest-like bases.
Seasonal Bird Themes
Seasonal variations add thematic depth to our bird crafting projects throughout the year. Spring birds incorporate pastel colors and flower elements, while autumn designs feature warm oranges and browns with leaf accents. Winter birds showcase white and silver tones with glitter effects, creating stunning display pieces that capture seasonal beauty.
Mixed Media Bird Projects
Mixed media approaches combine multiple crafting techniques within single bird creations for enhanced visual impact. We blend fabric bodies with paper wings, clay heads with wire legs, and wooden bases with felt accents to create unique textural contrasts. These combinations produce birds with 40% more visual interest compared to single-material projects.
Miniature Bird Collections
Miniature bird series allow us to create entire flocks using consistent scaling and complementary color schemes. Individual birds measure 2-3 inches in height, making them perfect for shadow boxes, dollhouses, or desktop displays. Collections of 5-7 birds create ever-changing compositions that tell visual stories about migration, nesting, or feeding behaviors.
Functional Bird Crafts
Functional bird designs serve practical purposes while maintaining artistic appeal through strategic design integration. Bird-shaped planters accommodate small succulents, while bird bookends support library collections with weights ranging from 1-2 pounds each. Garden stakes featuring bird silhouettes mark plant rows and add decorative elements to outdoor spaces.
Interactive Bird Mechanisms
Interactive elements transform static bird crafts into captivating kinetic sculptures through simple mechanical additions. Spring-loaded perches create bobbing movements, while weighted tails produce gentle swaying motions. Wind-activated wings flutter naturally when positioned near air currents, bringing birds to life through environmental interaction.
Cultural Bird Interpretations
Cultural themes inspire bird designs that reflect artistic traditions from different regions and time periods. Japanese crane styles emphasize elegant neck curves and symbolic positioning, while Mexican folk art birds feature bright patterns and geometric decorations. Native American interpretations incorporate earth tones and spiritual symbolism through feather and bead embellishments.
Conclusion
We’ve explored the wonderful journey of bird crafting from simple paper folds to intricate sculptures that capture nature’s beauty. Whether you’re drawn to origami’s meditative precision or clay’s sculptural possibilities each technique offers its own rewards and challenges.
Remember that mastering bird crafting takes practice and patience. Start with basic projects to build your confidence then gradually advance to more complex designs. Don’t let mistakes discourage you – they’re valuable learning opportunities that lead to better craftsmanship.
The beauty of bird making lies in its versatility and accessibility. With just paper and scissors or clay and your hands you can create stunning pieces that bring joy to your space. We encourage you to experiment with different materials colors and styles to develop your unique artistic voice in this timeless create.
Frequently Asked Questions
What types of bird crafts can beginners start with?
Beginners can start with simple paper bird crafts like origami cranes or basic paper mache projects. These techniques require minimal materials and tools while teaching fundamental skills. Fabric birds using simple sewing methods are also great for newcomers. These projects help build confidence before advancing to more complex materials like clay or wood carving.
What essential materials do I need for bird crafting?
Basic materials include paper, fabric, or clay depending on your chosen medium. You’ll need cutting tools, adhesives, paints, and brushes for detailing. Beginners should start with simple supplies like origami paper, fabric scraps, and basic craft glue. Advanced projects may require specialized equipment like sculpting tools, firing kilns, or woodworking instruments.
How can I make my bird crafts look more realistic?
Focus on accurate proportions and detailed features like eye placement and beak shaping. Use texturing techniques to simulate feathers and apply realistic color schemes. Pay attention to natural bird poses and wing positioning. Adding bases or armatures can help create dynamic displays that suggest movement and flight behaviors.
What are common mistakes to avoid in bird crafting?
Avoid rushing through preparation stages, as this leads to high failure rates. Don’t skip material testing or proper measurement verification. Common errors include overworking clay, using incorrect adhesives, and poor wing positioning. Always apply primer before painting, allow sufficient drying time, and use tools correctly to prevent damage to delicate features.
Can I combine different materials in one bird craft project?
Yes, mixed media projects combining various techniques create visually interesting pieces. You can integrate paper elements with fabric details, add clay components to wire armatures, or combine natural materials with synthetic ones. This approach allows for greater creative expression and can result in unique, multi-textured bird sculptures with enhanced artistic appeal.
How do I create functional bird crafts that serve practical purposes?
Design bird crafts that incorporate useful elements like storage compartments, hooks, or decorative holders. Consider creating bird-shaped planters, wall hooks disguised as perched birds, or decorative bowls with bird motifs. These functional pieces maintain artistic appeal while serving everyday purposes, making your crafts both beautiful and practical additions to your home.