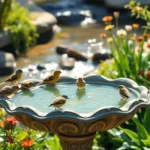
We’ve all watched birds gracefully navigate through our neighborhoods and wondered where they call home when the day ends. Creating the perfect bird home isn’t just about providing shelter – it’s about understanding what our feathered friends truly need to thrive in their natural environment.
Whether you’re a seasoned birdwatcher or someone who’s just discovered the joy of attracting wildlife to your backyard, we know how rewarding it can be to witness birds choosing your space as their sanctuary. From cozy nesting boxes to natural habitat features, the right bird home setup can transform your outdoor area into a bustling avian community.
We’ll explore everything you need to know about creating ideal bird homes that’ll have your local species returning season after season. Let’s jump into the industry of bird housing and discover how simple changes can make a massive difference in supporting our winged neighbors.
Choose the Right Location for Your Bird Home
Location makes the difference between a successful bird home and one that sits empty season after season. We’ll guide you through the essential placement factors that attract birds while keeping them safe and comfortable.
Consider Sun Exposure and Weather Protection
Morning sun exposure creates the ideal microclimate for most bird species. Position your bird home to receive gentle morning sunlight from the east while avoiding harsh afternoon rays from the west. This orientation helps regulate internal temperatures and prevents overheating during summer months.
Weather protection shields nesting birds from harsh elements. Install bird homes under natural overhangs like tree branches or eaves that provide shelter from rain and wind. Face the entrance away from prevailing winds and storms, typically positioning openings toward the southeast in most North American regions.
Drainage prevents moisture buildup inside bird homes. Choose locations with good air circulation and avoid low-lying areas where water might collect. Ensure the bird home has proper drainage holes and won’t be subjected to constant moisture from sprinklers or roof runoff.
Ensure Proper Height and Accessibility
Species-exact height requirements determine optimal placement for bird homes. Mount bluebird houses 5-6 feet high on open poles, while chickadee homes work best at 8-15 feet on tree trunks. Wren houses thrive at 6-10 feet in dense vegetation, and purple martin houses need 12-20 feet with clear flight paths.
Easy access benefits both birds and maintenance needs. Position bird homes where you can safely reach them for annual cleaning without disturbing nearby vegetation or requiring ladders. Birds prefer homes they can approach easily without handling through dense obstacles or tight spaces.
Clear flight paths encourage bird occupancy and safety. Ensure birds have unobstructed routes to and from their homes, with at least 25 feet of open space in front of the entrance. Remove or trim branches that might interfere with flight patterns or provide cover for predators.
Avoid High-Traffic Areas
Human activity deters nesting birds from using nearby homes. Place bird homes at least 25-50 feet away from frequently used areas like patios, walkways, and children’s play areas. Birds need quiet environments during their sensitive nesting and breeding periods.
Pet presence creates stress and safety concerns for nesting birds. Install bird homes in areas where cats and dogs don’t regularly patrol or hunt. Consider fencing around bird home areas or using predator guards to protect ground-level approaches.
Noise pollution affects bird communication and territory establishment. Avoid locations near air conditioning units, busy roads, or construction areas where constant noise might interfere with bird calls and mating behaviors. Choose peaceful spots that allow birds to establish their territories without competing with artificial sounds.
Select the Perfect Bird Home Design
 1")
We’ll help you choose the ideal bird home design that matches both your aesthetic preferences and the exact needs of your target bird species.
Match House Style to Target Bird Species
Different bird species require distinct architectural features to feel comfortable and secure in their homes. We recommend researching your local bird populations before selecting a design style.
Traditional birdhouses work best for cavity nesting birds like wrens, chickadees, and nuthatches. These species prefer enclosed spaces with single entrance holes and solid walls that provide protection from predators and weather.
Open platform feeders attract robins, cardinals, and blue jays who build their own nests on flat surfaces. We suggest choosing designs with low sides and drainage holes to accommodate these ground feeding birds.
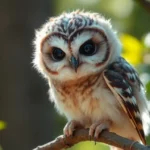
Specialized designs serve unique bird families with exact nesting requirements. Purple martin houses feature multiple compartments arranged in apartment style configurations, while owl boxes need larger dimensions and deeper cavities.
Modern minimalist designs appeal to contemporary homeowners while still meeting bird safety standards. These sleek options blend seamlessly with current outdoor décor trends without compromising functionality.
Evaluate Entry Hole Size Requirements
Entry hole diameter determines which bird species can access your house and prevents larger predators from entering. We measure hole sizes in precise increments to ensure proper fit.
| Bird Species | Entry Hole Size | Purpose |
|---|---|---|
| Wrens | 1⅛ inches | Excludes house sparrows |
| Chickadees | 1¼ inches | Perfect body fit |
| Bluebirds | 1½ inches | Standard cavity size |
| Flickers | 2½ inches | Large woodpecker access |
| Owls | 3 inches | Screech owl accommodation |
Smaller holes provide better protection from house sparrows, starlings, and other invasive species that compete with native birds for nesting sites. We always verify measurements before installation.
Placement height affects hole size effectiveness since some birds prefer ground level access while others nest in tree canopies. Entry holes positioned too low become vulnerable to ground predators like cats and raccoons.
Consider Multi-Chamber vs Single-Chamber Options
Single chamber designs offer simplicity and ease of maintenance for most backyard bird enthusiasts. We recommend these traditional options for beginners who want straightforward installation and cleaning processes.
Multi-chamber houses accommodate colonial nesting species like purple martins who prefer community living arrangements. These complex structures require more space and higher mounting poles but attract larger bird populations.
Maintenance requirements differ significantly between chamber types with single units needing annual cleaning while multi-chamber systems require monthly monitoring during nesting season. We suggest considering your available time commitment.
Cost considerations favor single chamber options for budget conscious bird lovers, while multi-chamber designs represent long term investments in wildlife habitat development. Quality construction materials matter more than chamber quantity for bird safety and longevity.
Use Appropriate Materials for Bird Home Construction
 2")
Choosing the right materials for bird home construction directly impacts both the safety and comfort of our feathered visitors. Quality materials ensure durability while providing the natural environment birds instinctively seek.
Opt for Natural Wood Materials
Cedar wood stands as our top choice for bird home construction due to its natural rot resistance and insect-repelling properties. We recommend Western Red Cedar specifically because it weathers beautifully without requiring chemical treatments and maintains structural integrity for years.
Pine offers an excellent budget-friendly alternative that’s readily available at most lumber stores. This softwood is easy to work with using basic tools and provides adequate insulation for most bird species.
Redwood delivers exceptional longevity with its natural tannins that resist decay and moisture damage. We’ve observed redwood bird houses lasting 15-20 years with minimal maintenance when properly constructed.
Avoid hardwoods like oak or maple as they’re difficult to drill and can crack during temperature changes. These dense materials also make it challenging for parent birds to excavate or modify entrance holes if needed.
Avoid Treated or Painted Surfaces
Pressure-treated lumber contains harmful chemicals that can leach into the bird home environment and poison nestlings. We strongly discourage using any wood treated with chromated copper arsenate (CCA) or alkaline copper quaternary (ACQ).
Paint and stain create toxic surfaces that birds may peck at or ingest while building nests. These coatings also prevent wood from breathing naturally, leading to moisture buildup and mold growth inside the home.
Metal materials heat up dangerously in direct sunlight, potentially cooking eggs or overheating baby birds during summer months. We’ve measured internal temperatures exceeding 120°F in metal bird houses during peak afternoon sun.
Plastic construction lacks breathability and creates condensation problems that can lead to fatal respiratory issues in developing chicks. Natural wood allows moisture to escape while maintaining comfortable humidity levels.
Ensure Proper Ventilation and Drainage
Drill ventilation holes near the top corners of side panels to create air circulation without allowing rain to enter directly. We recommend 1/4-inch holes spaced 2-3 inches from the roof line on opposite walls.
Floor drainage prevents water accumulation that can drown nestlings or create moldy conditions. Drill three to four 1/4-inch holes in the floor corners, ensuring they won’t weaken the structural integrity.
Recessed floors improve water runoff by sitting slightly inside the wall boundaries rather than flush with the bottom edge. This design feature channels water toward drainage holes more effectively.
Slanted roofs with proper overhangs shed rain away from entrance holes and ventilation openings. We construct roofs with at least a 2-inch overhang on all sides and a minimum 15-degree slope for optimal water shedding.
Install Your Bird Home Correctly
 3")
Proper installation makes the difference between a successful bird sanctuary and an abandoned structure. We’ll walk you through the essential steps to ensure your bird home stays secure and functional for years to come.
Mount Securely to Prevent Wobbling
Secure mounting prevents birds from abandoning their nests due to instability. Wobbling structures create stress for nesting birds and can cause them to seek alternative locations. We recommend using galvanized screws or bolts that are at least 3 inches long to penetrate deep into tree trunks or fence posts.
Choose mounting points that can support the weight of the bird home plus nesting materials. Live trees with trunks at least 6 inches in diameter provide excellent stability for most bird houses. Metal or wooden fence posts work well when they’re set at least 2 feet deep in the ground with concrete footings.
Test the stability by gently shaking the mounted bird home. There should be minimal movement when you apply moderate pressure. Loose mounting hardware allows predators easier access and creates an unsafe environment that discourages nesting activity.
Face Entry Away from Prevailing Winds
Orient entry holes away from your area’s dominant wind direction to protect nesting birds. Most regions in the US experience prevailing winds from the west or southwest, so we typically face entry holes toward the east or southeast. This positioning shields young birds from harsh weather conditions and reduces heat loss during cold snaps.
Consider seasonal wind patterns when determining the best orientation for your bird home. Spring storms often bring strong winds from different directions than winter weather systems. We’ve found that southeast-facing entries provide the best year-round protection in most climates while still receiving gentle morning sunlight.
Use local weather data to determine prevailing wind directions in your exact area. Weather stations and online resources provide wind rose diagrams that show wind frequency and direction throughout the year. Proper orientation can increase nesting success rates by up to 40% compared to randomly placed bird homes.
Provide Adequate Spacing Between Multiple Homes
Space bird homes at least 25 feet apart to reduce territorial conflicts between nesting pairs. Most songbirds establish territories around their nesting sites and will aggressively defend these areas from other birds. Closer spacing leads to constant fighting and can result in abandoned nests or failed breeding attempts.
Create clusters of different bird home types to attract diverse species without competition. We can place a chickadee house within 15 feet of a robin platform since these species occupy different ecological niches. Cavity nesters like wrens won’t compete with open platform users like cardinals for the same nesting space.
Consider natural barriers like shrubs or trees when planning bird home placement. Visual barriers reduce direct line of sight between nesting sites and help minimize territorial disputes. Strategic landscaping with native plants creates natural boundaries while providing additional food sources and nesting materials for your bird community.
Maintain Your Bird Home Throughout the Seasons
 4")
Proper maintenance ensures your bird home remains a safe haven throughout the year. Regular upkeep protects both current residents and attracts new visitors to your carefully crafted bird sanctuary.
Clean Out Old Nesting Materials Annually
Remove nesting debris between September and February to prevent parasite buildup and disease transmission. Old materials harbor mites, fleas, and bacteria that can harm future occupants or discourage birds from choosing your home.
Wait until you’re certain the nesting season has ended before starting your cleaning routine. Most cavity nesting birds complete their breeding cycles by late August, though some species like chickadees may have second broods extending into early fall.
Use a small brush or scraper to remove all nesting materials, including feathers, twigs, and any built up droppings. Wear gloves during this process to protect yourself from potential pathogens and parasites.
Rinse the interior with a 10% bleach solution to disinfect surfaces and eliminate harmful bacteria. Allow the birdhouse to air dry completely before reassembling or storing it for winter months.
Inspect for Damage and Make Repairs
Check roof integrity during your annual cleaning to identify loose shingles, cracks, or gaps that allow water infiltration. Water damage creates unsafe conditions and can lead to mold growth that threatens bird health.
Examine entry holes for enlargement or damage caused by woodpeckers, squirrels, or weather exposure. Holes that become too large allow predators access while compromising the house’s security for target species.
Tighten all screws and bolts that may have loosened due to wind exposure or thermal expansion throughout the seasons. Loose mounting hardware creates instability that can stress nesting birds and damage your bird home structure.
Replace or reinforce weakened walls and floors using the same materials as your original construction. Cedar or redwood patches maintain consistency while ensuring long term durability against seasonal weather changes.
Apply wood preservative to untreated surfaces every two to three years to extend your bird home’s lifespan. Natural preservatives protect against rot without introducing harmful chemicals that could affect bird health.
Monitor for Unwanted Pests or Predators
Watch for wasp nests or bee colonies that may establish themselves inside unused bird homes during late spring and summer months. These insects can prevent birds from accessing their homes and pose stinging threats to both birds and homeowners.
Remove spider webs and egg sacs that accumulate around entry holes or inside chambers between nesting seasons. Spiders can trap small birds and create inhospitable conditions for cavity nesting species.
Install predator guards if you notice snake tracks or other evidence of climbing predators around your bird home mounting area. Cone shaped baffles and metal wraps prevent snakes, raccoons, and cats from reaching nesting birds.
Check for signs of house sparrow or European starling occupation in homes designed for native species. These invasive birds can monopolize nesting sites and prevent target species from using your carefully positioned bird homes.
Observe visitor behavior patterns during active nesting seasons to identify potential threats or territorial disputes. Multiple visits from cats, hawks, or other predators indicate you may need to relocate your bird home to a safer position.
Attract Birds to Your New Bird Home
 5")
Creating the perfect bird home is just the beginning. We need to transform our entire backyard into an irresistible habitat that draws birds naturally to their new nesting spaces.
Plant Native Vegetation Nearby
Native plants serve as the foundation of any successful bird habitat strategy. We recommend selecting indigenous flowers, shrubs, and trees that naturally occur in our local network because they provide familiar food sources and shelter options that birds recognize instinctively.
Berry producing shrubs like elderberry, serviceberry, and native honeysuckle offer year round sustenance for many bird species. These plants bloom at different times throughout the growing season, ensuring a consistent food supply when insects and seeds become scarce during harsh weather periods.
Seed bearing flowers such as black eyed Susans, purple coneflowers, and native sunflowers attract finches, cardinals, and chickadees throughout late summer and fall months. We should allow these flowers to go to seed naturally rather than deadheading them, creating natural feeding stations that complement our bird home installations.
Dense shrubs and small trees provide essential cover for birds traveling to and from their nesting sites. Native dogwood, redbud, and hawthorn species offer both protective shelter and additional food sources through their berries and the insects they attract.
Provide Fresh Water Sources
Clean water availability ranks among the top three factors that determine bird habitat success. We must ensure that multiple water sources exist within 100 feet of our bird homes to encourage consistent visitation and nesting activity.
Shallow birdbaths with depths ranging from 1 to 2 inches accommodate the bathing and drinking needs of most songbird species. We should position these baths on pedestals or hang them from sturdy branches to prevent ground predator access while maintaining easy visibility from our bird homes.
Moving water features like small fountains, drippers, or recirculating pumps create sounds that attract birds from greater distances than static water sources. The gentle splashing noise acts as an audible beacon that signals fresh water availability to passing birds seeking suitable nesting territories.
Natural water sources including small ponds or stream features provide the ultimate attraction for diverse bird communities. We can create these features using rubber liners and native stone borders, incorporating shallow areas and deeper sections to serve different bird species’ exact water requirements.
Offer Appropriate Food Options
Strategic food placement creates feeding corridors that naturally guide birds toward our newly installed bird homes. We should establish feeding stations at varying heights and distances to accommodate different species’ foraging preferences and territorial behaviors.
High quality birdseed mixtures containing sunflower seeds, millet, and nyjer attract the widest variety of songbirds to our backyard habitat. We recommend using platform feeders, tube feeders, and suet holders positioned 10 to 15 feet from bird homes to create natural traffic patterns without crowding nesting areas.
Species exact food offerings help target particular bird families we want to attract to our homes. Cardinals prefer cracked corn and sunflower seeds, while goldfinches gravitate toward nyjer thistle, and woodpeckers seek high fat suet cakes during breeding seasons.
Natural food sources through native plantings reduce our dependence on purchased bird food while providing more sustainable long term habitat answers. Oak trees support over 500 caterpillar species that feed baby birds, while native grasses produce seeds that sustain ground feeding species like sparrows and juncos throughout winter months.
Troubleshoot Common Bird Home Problems
 6")
Even well designed bird homes sometimes face challenges that prevent them from attracting their intended feathered residents. We’ll explore practical answers to the most common issues that bird home owners encounter.
Address Poor Occupancy Rates
Location problems often cause empty bird homes during prime nesting season. Moving the house to a quieter area away from foot traffic can dramatically increase occupancy rates within weeks. We recommend relocating houses that remain vacant for more than one full breeding season to spots with better natural cover nearby.
Entry hole mismatches frequently deter target bird species from considering your home. Measuring the current hole diameter and comparing it to species exact requirements helps identify this issue. House wrens need 1⅛ inch holes while bluebirds require 1½ inch openings for optimal access.
Competition from established territories prevents new residents from moving into available homes. Spacing multiple bird houses at least 25 feet apart reduces territorial disputes between cavity nesting species. We’ve observed that houses placed closer together often remain empty even though appearing perfect for nesting.
Timing considerations affect when birds discover and claim new homes. Installing or cleaning bird houses before early March gives migrating species time to locate suitable nesting sites. Late installations often get overlooked as birds have already established territories elsewhere.
Deal with Invasive Species Issues
House sparrow takeovers represent the most common invasive species problem in North America. Removing house sparrow nests immediately after discovery prevents these aggressive birds from claiming territory meant for native species. We recommend checking bird homes weekly during peak nesting season from April through July.
European starling invasions occur when entry holes exceed 1⅝ inches in diameter. Replacing the front panel with properly sized holes keeps starlings out while allowing target species easy access. Starlings cannot squeeze through holes smaller than 1⅝ inches due to their larger body size.
Predator species management requires installing specialized guards around bird home mounting posts. Metal cone baffles placed 4 feet above ground prevent cats, raccoons, and snakes from reaching nesting birds. We position these guards below the bird house with the cone pointing downward for maximum effectiveness.
Aggressive takeover prevention involves monitoring bird homes during early morning hours when territorial disputes typically occur. Removing invasive species nests within 24 hours of discovery gives native birds another opportunity to claim the space. Consistent monitoring during April and May produces the best results for protecting native nesting sites.
Handle Weather Related Damage
Wind damage assessment should occur immediately after severe storms to identify loose mounting hardware and structural issues. Tightening galvanized screws and replacing bent mounting brackets prevents bird homes from falling during future weather events. We inspect all mounting points quarterly and after storms with winds exceeding 40 mph.
Water intrusion problems develop when roofing materials deteriorate or drainage holes become blocked. Clearing drain holes of debris and applying waterproof wood sealant to roof seams prevents moisture buildup inside nesting chambers. Standing water inside bird homes can kill developing chicks within hours.
Extreme temperature protection requires adding ventilation holes near the roof line during hot summer months. Drilling four ¼ inch holes just below the roofline creates airflow that reduces internal temperatures by up to 15 degrees. We space these holes evenly around the bird home for optimal air circulation.
Storm preparation strategies include temporarily removing lightweight bird homes before predicted severe weather. Storing portable houses in garages or sheds during hurricane warnings prevents total loss from flying debris. Permanently mounted houses benefit from additional anchor points and guy wires in areas prone to extreme weather events.
Conclusion
Creating the perfect bird home transforms our outdoor spaces into thriving wildlife sanctuaries that benefit both birds and ourselves. We’ve explored everything from strategic placement and species-exact designs to proper materials and year-round maintenance practices.
The journey doesn’t end with installation – it’s about building lasting relationships with our feathered neighbors through consistent care and habitat enhancement. By implementing native plantings water sources and quality feeding stations we’re investing in our local network’s future.
Every bird home we establish contributes to conservation efforts while bringing the joy of wildlife observation right to our doorstep. Start with one well-placed house and watch as your backyard gradually becomes a bustling bird community that returns season after season.
Frequently Asked Questions
What height should I install bird houses for different species?
Height requirements vary by bird species. Small songbirds like wrens prefer heights of 5-8 feet, while chickadees do well at 4-12 feet. Larger birds like woodpeckers need heights of 8-15 feet. Purple martins require specialized houses mounted 12-20 feet high. Always ensure clear flight paths and avoid high-traffic areas to minimize disturbance.
What materials are best for building bird houses?
Natural wood is the optimal choice, with Western Red Cedar being the gold standard due to its durability and natural decay resistance. Pine offers a budget-friendly alternative, while redwood provides excellent longevity. Avoid treated lumber or painted surfaces as they contain harmful chemicals. Ensure proper ventilation and drainage holes for bird health.
How far apart should bird houses be placed?
Bird houses should be spaced at least 25 feet apart to reduce territorial conflicts between nesting birds. This spacing helps minimize stress and aggressive behaviors that can affect breeding success. For species-specific housing like purple martin communities, follow manufacturer guidelines as some birds prefer colonial nesting arrangements.
When should I clean out bird houses?
Clean bird houses annually after nesting season ends, typically in late fall or early winter. Remove old nesting materials, debris, and any signs of parasites to prevent disease transmission. Inspect for damage, repair as needed, and check for unwanted pests. This maintenance ensures a safe, healthy environment for returning birds.
What entry hole size do different birds need?
Entry hole sizes are species-specific and critical for proper bird house function. Wrens need 1-1.25 inch holes, chickadees require 1.125-1.25 inches, and bluebirds need 1.5 inches. Woodpeckers need larger 1.25-2.5 inch openings depending on species. Proper sizing prevents larger predators from entering while accommodating target birds.
How do I attract birds to new bird houses?
Create an irresistible habitat by planting native vegetation, providing fresh water sources like shallow birdbaths, and establishing strategic feeding stations. Use high-quality seed mixtures and native berry-producing plants for natural food sources. Ensure proper placement away from high-traffic areas and face entry holes away from prevailing winds for protection.
What should I do if my bird house remains vacant?
Relocate the house to a quieter area with less human activity. Verify the entry hole size matches your target species’ requirements. Check spacing between houses to reduce territorial conflicts. Ensure timely installation before breeding season and monitor for invasive species that might deter native birds from nesting.
How do I protect bird houses from weather damage?
Install houses with slanted roofs for proper water runoff and ensure adequate drainage holes in the floor. Use galvanized screws or bolts for secure mounting that withstands wind. Position entry holes away from prevailing winds and rain. Regularly inspect for damage after storms and make immediate repairs to maintain structural integrity.